Category: CASSEROLE

  • Chicken Fajita Casserole

    Chicken Fajita Casserole

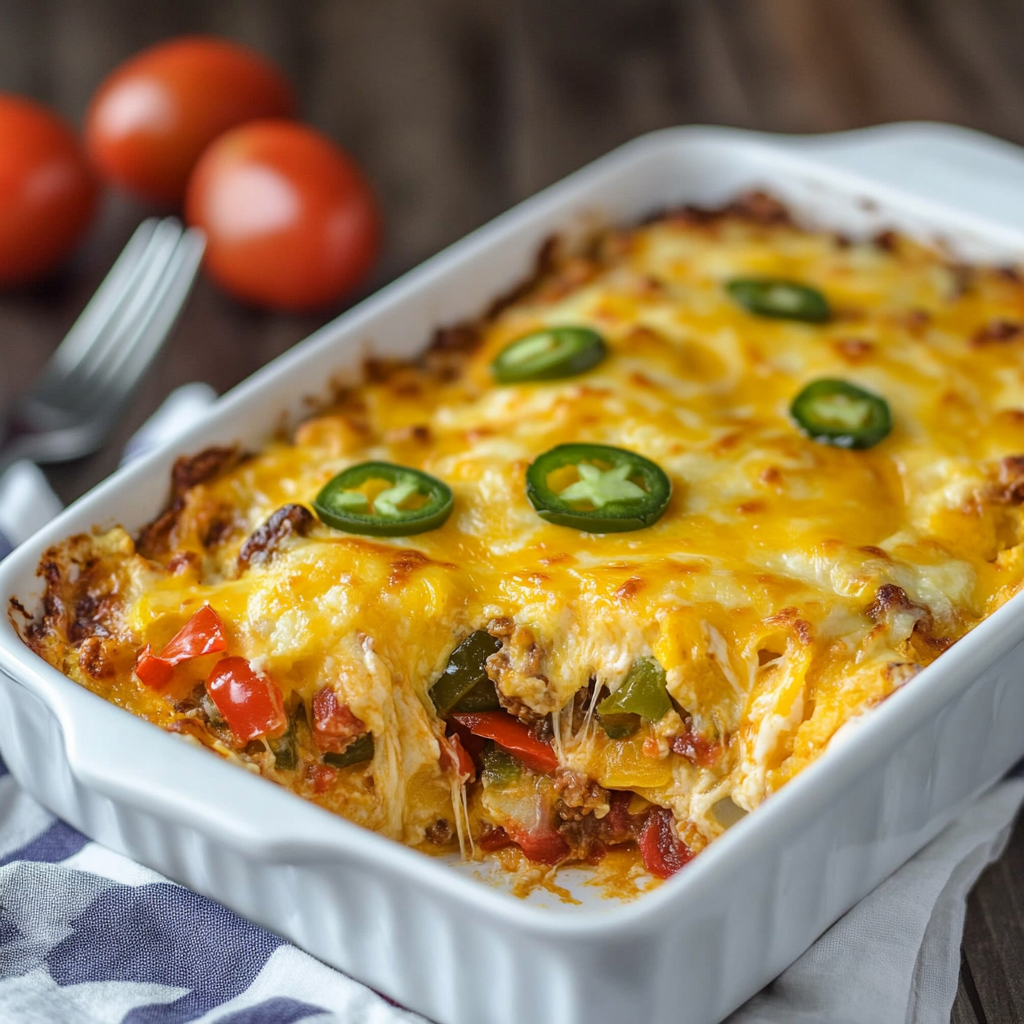
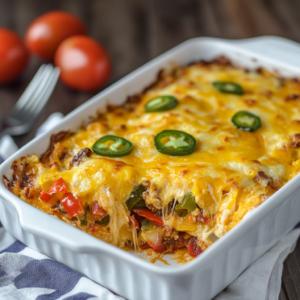
    Chicken Fajita Casserole is a quick, crowd-pleasing dinner that brings all the zesty Tex-Mex flavors together in a single dish. Perfect for busy weeknights or casual family meals.

    With juicy chicken, sweet peppers, and melted cheese baked to perfection, this casserole captures the sizzling flavor of fajitas—no skillet required. It’s hearty, satisfying, and ready in under 40 minutes.

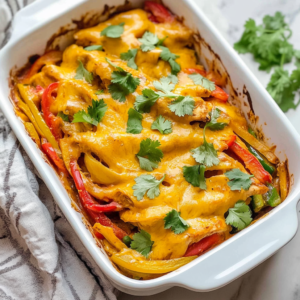
    What You’ll Need for This Flavor-Packed Chicken Fajita Casserole

    • Chicken breasts – The heart of the dish, they soak up seasoning and stay tender as they bake under the veggies and cheese.
    • Fajita seasoning – A smoky, spicy blend that brings bold flavor to every bite and mimics classic fajita sizzle.
    • Vegetable oil – Helps the seasoning coat the chicken evenly and keeps everything juicy during baking.
    • Bell peppers – Sliced into colorful strips, they soften as they bake, adding natural sweetness and crunch.
    • Yellow onion – Brings savory depth and mild sweetness, tying the vegetables together beautifully.
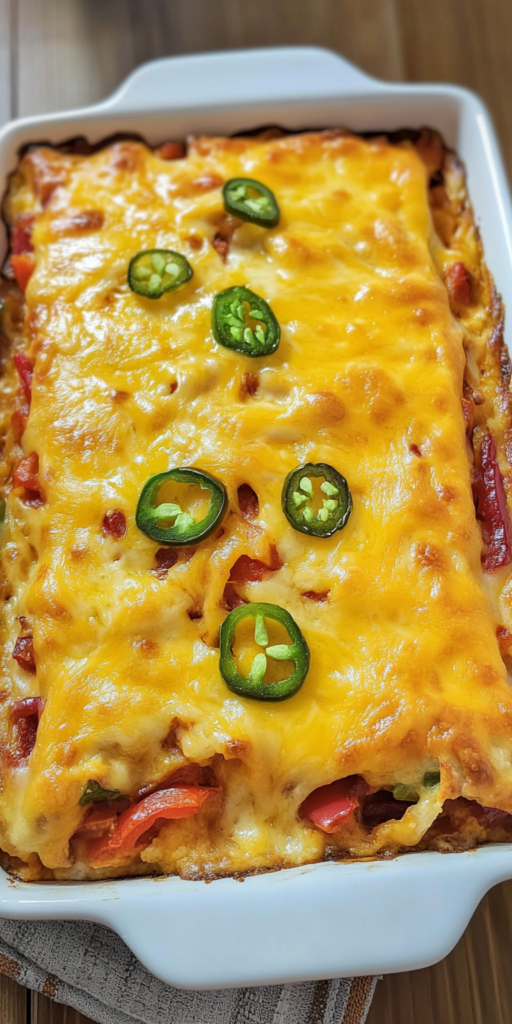
    • Shredded cheese – Melts over everything to create a gooey, golden blanket of richness.
    • Fresh cilantro – A bright, herbal garnish that adds color and freshness to finish the dish.

    How to Make Chicken Fajita Casserole in a Flash

    Start by preheating your oven to 400°F. In a baking dish, coat the chicken breasts with fajita seasoning and oil—massage it in to ensure every inch is packed with flavor.

    Layer sliced bell peppers and onions on top of the chicken, and sprinkle a little extra seasoning for good measure. Finish it off with a generous handful of shredded cheese over the top.

    Bake uncovered for 25–30 minutes until the chicken is cooked through and the cheese is bubbling and golden. Serve hot with fresh cilantro scattered over the top.

    Tips, Tricks, and Tempting Twists

    To ensure your chicken stays juicy, avoid overbaking—an instant-read thermometer is your best friend here. If you’re pressed for time, cube the chicken to reduce cook time by several minutes without sacrificing flavor.

    Want to lighten things up? Skip the cheese and opt for a crisp topping of parmesan and panko. For a heartier twist, stir in cooked pasta before baking, or serve over rice for a more traditional pairing.

    Low-carb eaters can spoon this over cauliflower rice, while flavor seekers will love it paired with garlic butter noodles or Mexican rice. It’s endlessly customizable, making it a staple for every taste.

    Storing and Reheating Chicken Fajita Casserole Like a Pro

    Store leftovers in an airtight container in the fridge for up to 4 days. For best results, reheat in the oven at 350°F for 15–20 minutes to keep the texture of the veggies and cheese intact.

    Microwaving is quicker and still tasty, though the peppers may soften more. This casserole doesn’t freeze particularly well due to the fresh vegetables, but it’s usually gone before you need to worry about that!

    Chicken Fajita Casserole

    A hearty and vibrant one-dish dinner, Chicken Fajita Casserole delivers the bold flavors of classic fajitas with minimal cleanup. Ready in just under 40 minutes, it’s a quick and satisfying option for a weeknight family meal.
    Prep Time 10 minutes
    Cook Time 30 minutes
    Total Time 40 minutes

    Ingredients
      

    • 1 ½ cups shredded cheese
    • 2 tablespoons fajita seasoning
    • 2 medium bell peppers sliced into strips
    • 1 tablespoon vegetable oil
    • 1 ½ pounds 680 g boneless, skinless chicken breasts
    • 1 medium yellow onion thinly sliced
    • Freshly chopped cilantro for garnish

    Instructions
     

    • Preheat the oven to 400°F (200°C).
    • Place the chicken breasts directly into a baking dish and coat them evenly with vegetable oil and fajita seasoning, massaging the mixture to ensure thorough coverage.
    • Layer the sliced bell peppers and onion over the seasoned chicken. Lightly sprinkle additional fajita seasoning over the vegetables for enhanced flavor.
    • Evenly distribute the shredded cheese on top of the mixture.
    • Transfer the baking dish to the oven and bake, uncovered, for 25 to 30 minutes, or until the chicken reaches an internal temperature of 165°F (74°C).
    • Once baked, remove from the oven and garnish with freshly chopped cilantro before serving.

    Notes

    Ensure the chicken is fully cooked by checking that its internal temperature reaches 165°F (74°C) using a kitchen thermometer.
    Any variety of melting cheese is suitable for this casserole.
    For a lighter option, omit the cheese and instead top with a blend of Parmesan and panko breadcrumbs, then mist with oil before baking.
    To expedite cooking, dice the chicken into smaller cubes, which will reduce overall bake time.
    This dish pairs well with garlic butter pasta, plain or Mexican-style rice, or cauliflower rice for a low-carb alternative.
    For leftovers, reheat in a 350°F (175°C) oven for 15–20 minutes or use the microwave for convenience.
  • John Wayne Casserole

    John Wayne Casserole

    John Wayne Casserole is a bold and comforting dish that combines seasoned beef, vegetables, and a biscuit crust in a truly satisfying bake. It’s hearty, flavorful, and layered to perfection.

    Inspired by Tex-Mex flavors and rich with melted cheese, creamy sauce, and a hint of spice, John Wayne Casserole is a crowd-pleasing weeknight dinner or potluck favorite.

    Inside the Ingredients That Make John Wayne Casserole a Star

    • Ground beef – The savory base of the casserole, richly seasoned and satisfying.
    • Taco seasoning – Adds bold, zesty flavor that gives the beef its Tex-Mex flair.
    • Large biscuits – Baked into a golden crust that cradles the casserole’s layers.
    • Sour cream – Brings creamy tang that balances the spice and richness.
    • Mayonnaise – Adds smoothness and body to the creamy layer for depth.
    • Cheddar cheese – Sharp and melty, it weaves everything together beautifully.
    • Onion – Offers sweetness and a hint of bite, used both fresh and sautéed.
    • Tomatoes – Juicy slices bring brightness and a fresh contrast.
    • Red bell pepper – Adds sweetness and color to balance the savory layers.
    • Jalapeño peppers – Sliced and layered for just the right kick of heat.

    How to Make John Wayne Casserole: A Delicious Layered Journey

    Start by pressing the biscuits into a casserole dish to form the crust and baking it until lightly golden. While that bakes, brown your ground beef and season it with taco seasoning for a punch of flavor.

    Next, stir together the sour cream, mayo, cheese, and onions to create a creamy layer that melts into the other ingredients. Sauté the remaining onions and bell pepper until just tender.

    Layer the cooked biscuit crust with seasoned beef, fresh tomato slices, sautéed veggies, jalapeños, and the creamy cheese mixture. Finish with a generous sprinkle of cheddar on top, then bake until bubbling and golden.

    Casserole Know-How: Tips and Tasty Twists

    For extra heat, use fresh jalapeños or pepper jack cheese. Prefer it milder? Skip the peppers or use just a few. To make it extra hearty, add black beans or corn between layers.

    Keep an eye on the crust during its first bake—it should be barely browned so it doesn’t overcook later. Using an oven thermometer helps keep things accurate, especially since ovens can vary more than expected.

    Switch things up by using ground turkey or chicken instead of beef. You can also experiment with different cheeses or add a handful of chopped green onions on top before serving for an extra pop of flavor.

    Storing and Reheating Your Leftover John Wayne Casserole

    Let the casserole cool completely before covering it tightly with foil or transferring to an airtight container. It keeps well in the fridge for up to four days and reheats beautifully in the oven at 350°F.

    To freeze, slice portions and wrap them individually, then freeze for up to two months. Reheat straight from frozen at 375°F, covered with foil, until hot all the way through—usually about 25–30 minutes.

    This dish holds its flavor and texture well, making it a great make-ahead or meal prep option.

    John Wayne Casserole

    This hearty and flavorful American-style casserole blends zesty taco-seasoned beef with a rich, creamy topping, layered over a soft biscuit base. Perfect for a comforting family dinner, it brings a satisfying mix of textures and bold flavors.
    Prep Time 20 minutes
    Cook Time 1 hour
    Total Time 1 hour 20 minutes

    Ingredients
      

    • 1 ounce packet taco seasoning prepared with water as directed
    • ½ cup mayonnaise
    • 8 ounces cheddar cheese shredded and divided
    • 2 pounds ground beef browned and drained
    • 4 ounces canned sliced jalapeño peppers
    • ½ cup sour cream
    • 1 medium onion halved and sliced
    • 16 ounce can large biscuits
    • 2 medium tomatoes sliced
    • 1 medium red bell pepper halved and sliced

    Instructions
     

    • Preheat the oven to 350°F and adjust the rack to the center position. Lightly grease a 13×9-inch glass baking dish.
    • Arrange biscuits in a single layer in the prepared dish, pressing them together and up the sides halfway. Set the dish on a baking sheet and bake for 12–15 minutes, watching closely after 12 minutes. The edges should be barely golden. Remove and keep the oven on.
    • While the biscuits bake, cook the ground beef with the taco seasoning and specified amount of water according to package instructions. Set the seasoned beef aside.
    • In a clean bowl, stir together the sour cream, mayonnaise, 4 ounces of cheddar cheese, and half of the sliced onion. Mix until smooth and set aside.
    • Using the same skillet, sauté the remaining onion and red bell pepper until slightly softened.
    • To assemble, layer the following over the baked biscuit base: seasoned beef, tomato slices, sautéed peppers and onions, jalapeño slices, then spread the sour cream mixture evenly on top. Finish with the remaining 4 ounces of shredded cheese.
    • Bake the assembled casserole uncovered for 30–40 minutes, until the cheese is melted and the biscuit crust is lightly golden around the edges.

    Notes

    Monitor your oven closely, as baking times may vary. A lightly browned crust indicates readiness.
  • Sloppy Joe Casserole

    Sloppy Joe Casserole

    Sloppy Joe Casserole is a hearty fusion of classic comfort food and weeknight convenience, perfect for feeding a hungry crowd or freezing for future meals. Cheesy, beefy, and full of bold flavor, it’s a dinner favorite.

    This easy, cheesy pasta bake brings together savory ground beef, sweet Manwich sauce, and melty Velveeta, baked into a golden, bubbling casserole. Every bite is packed with nostalgic flavor and comforting textures.

    Key Ingredients That Make Sloppy Joe Casserole Irresistible

    • Ground beef – The hearty, savory base of this dish, giving it rich flavor and classic Sloppy Joe depth.
    • Manwich sauce – A sweet and tangy tomato-based sauce that delivers bold, unmistakable Sloppy Joe flavor.
    • Farfalle pasta – These bow-tie noodles hold onto the sauce beautifully and create a satisfying bite.
    • Velveeta cheese – Adds creaminess and smooth melt that ties everything together into a cheesy delight.
    • Diced tomatoes – Juicy and slightly acidic, they balance out the richness and add texture to every bite.
    • Corn – Sweet pops of flavor throughout the casserole, adding contrast and warmth.
    • Cheddar cheese – Melts into a bubbly, golden topping that seals in the flavor and keeps you coming back for more.

    Let’s Make It: How to Cook Sloppy Joe Casserole

    Start by browning the ground beef and softening the onions. Once they’re cooked through, pour in Manwich sauce, chicken broth, and undrained diced tomatoes.

    Bring the mixture to a gentle boil and stir in the farfalle. Let it cook until al dente, stirring occasionally so nothing sticks to the pot.

    Reduce heat and fold in the corn, then gently stir in the Velveeta cubes until smooth and melty. Transfer the mixture to a greased casserole dish.

    Top with cheddar cheese, cover, and bake until hot and bubbly. Remove the cover before serving to reveal that golden, cheesy finish.

    Pro Tips & Tasty Variations for the Best Sloppy Joe Casserole

    For extra depth of flavor, try swapping in smoked paprika or a dash of hot sauce into the meat mixture. Ground turkey can easily replace ground beef for a lighter option without sacrificing richness.

    If you prefer a more al dente bite or plan to freeze the dish, slightly undercook the pasta before baking. Craving crunch? Sprinkle crushed tortilla chips or crispy onions over the cheddar cheese before baking for a satisfying texture contrast.

    This casserole also welcomes variation—try black beans, green bell peppers, or jalapeños stirred in with the corn for a Tex-Mex twist.

    Leftovers? Here’s How to Keep That Cheesy Goodness Fresh

    Sloppy Joe Casserole stores beautifully. Let it cool completely, then refrigerate in an airtight container for up to four days.

    To freeze, wrap the casserole dish tightly in foil and freeze for up to two months. Thaw overnight in the fridge before reheating.

    Reheat in the oven at 350°F, covered, until warmed through, or microwave individual portions for a quick and cozy lunch.

    Sloppy Joe Casserole

    A hearty, comforting casserole featuring tender pasta combined with savory ground beef and sweet corn, all enveloped in a rich, cheesy Manwich and tomato sauce, then finished with a golden cheddar topping.
    Prep Time 5 minutes
    Cook Time 45 minutes
    Total Time 50 minutes

    Ingredients
      

    • 1 cup corn frozen or well-drained from a can
    • 1 ½ cups shredded cheddar cheese
    • 1 lb. 85% lean ground beef
    • 8 oz. Velveeta cheese cut into cubes
    • ½ cup diced onions
    • 1 15.5 oz. can Manwich sauce
    • ¾ pound uncooked farfalle pasta
    • 2 ½ cups chicken broth
    • 1 14.5 oz. can diced tomatoes including liquid

    Instructions
     

    • Set the oven to preheat at 375°F.
    • In a large, deep skillet over medium-high heat, cook the ground beef, breaking it apart for 2 minutes. Introduce the onions and continue to sauté for another 5 minutes until the beef is browned and the onions have softened. Drain the excess fat.
    • Incorporate the Manwich sauce, chicken broth, and undrained diced tomatoes into the skillet.
    • Bring the mixture to a mild boil and stir in the pasta, ensuring an even distribution.
    • Cover the pot and maintain a gentle boil until the pasta reaches an al dente texture, stirring occasionally to prevent sticking. Extend cooking time slightly beyond the box instructions due to the gentle boil. Sample a piece to verify readiness.
    • Lower the heat and add the corn, stirring to combine. Introduce the cubed Velveeta, cover the pot to aid melting, then uncover and stir until thoroughly blended.
    • Transfer the mixture to a greased 9×13-inch casserole dish.
    • Evenly distribute the shredded cheddar over the top.
    • Cover with foil and bake for 15 minutes. Once finished, remove from the oven and serve, ideally accompanied by cornbread.

    Notes

    Make-Ahead Option: Assemble the dish fully and sprinkle with cheese. Store covered in the refrigerator for up to three days. When ready to bake, allow to sit at room temperature for 30 minutes, then bake covered at 350°F for 25 minutes.
    Different types of pasta can be substituted—adjust the cooking time based on package directions. Penne works particularly well.
    Using a full pound of pasta is possible, though this may reduce the sauce-to-pasta ratio.
  • Million Dollar Ravioli Casserole

    Million Dollar Ravioli Casserole

    Million Dollar Ravioli Casserole brings comfort food to the next level with layers of creamy cheese, bold Italian sausage, and tender ravioli smothered in rich tomato sauce. It’s the ultimate family-favorite dinner.

    Easy to prep and perfect for feeding a crowd, this cheesy baked pasta is a go-to for potlucks, parties, or cozy nights in. Each bite tastes like a million bucks!

    What You’ll Need for This Million Dollar Ravioli Casserole

    • Italian sausage – Adds rich, savory depth and a hint of spice that infuses the entire casserole.
    • Spaghetti sauce – A classic tomato base that binds everything together with comforting familiarity.
    • Cottage cheese – Offers a creamy, slightly tangy layer that softens the overall richness.
    • Cream cheese – Makes the filling decadently smooth and indulgent.
    • Sour cream – Brightens the flavor profile with a light, tangy contrast.
    • Parmesan cheese – Lends a salty, nutty bite that sharpens the creamy mixture.
    • Frozen cheese ravioli – The heart of the dish, providing tender pasta and melty cheese in one convenient package.
    • Mozzarella cheese – Melts into a golden, bubbly topping that pulls everything together.

    How to Make This Cheesy Dream Come True

    Start by browning the Italian sausage until perfectly cooked, then stir in your favorite jarred spaghetti sauce for a quick and hearty meat sauce.

    While the sauce simmers, blend the cottage cheese, cream cheese, sour cream, parmesan, parsley, and garlic powder into a luscious, tangy mixture. Toss the frozen ravioli gently in this creamy cheese blend.

    Layer the coated ravioli in a greased baking dish, spoon the meat sauce over top, and finish with a generous sprinkle of mozzarella. Bake uncovered until bubbly and golden.

    Tips & Twists for a Million Dollar Bite Every Time

    To customize this casserole, try swapping the Italian sausage for ground beef or turkey, or spice it up with hot sausage. Add chopped spinach or sautéed mushrooms to the cheese mixture for an extra layer of flavor and texture.

    Want to elevate it further? A drizzle of pesto before baking or a topping of fresh basil after serving adds a fresh, herby note. For a crispier top, broil the casserole for the last 2–3 minutes.

    Letting it rest before serving ensures cleaner slices and better flavor melding, so don’t skip that cool-down time.

    Stashing the Leftovers: The Million Dollar Way

    This casserole is a dream when it comes to make-ahead meals. Simply refrigerate the fully assembled, unbaked casserole for up to 2 days or freeze it for up to 3 months.

    If frozen, thaw overnight in the fridge before baking as directed. Leftover portions can be stored in airtight containers in the fridge for 3–4 days. Reheat individual servings in the microwave or pop the whole dish back in the oven to warm through.

    Million Dollar Ravioli Casserole

    An indulgent and crowd-pleasing baked pasta dish layered with rich meat sauce, tender cheese-filled ravioli, and a luscious blend of four cheeses. Perfect for gatherings or as a make-ahead freezer meal, this casserole combines ease and flavor for a truly satisfying main course.
    Prep Time 15 minutes
    Cook Time 45 minutes
    Total Time 1 hour

    Ingredients
      

    • ¼ cup sour cream
    • 1 25-oz package frozen cheese ravioli
    • ½ tsp garlic powder
    • 1 8-oz package cream cheese, softened
    • 2 Tbsp parsley
    • 1 28-oz jar spaghetti sauce
    • 2 cups mozzarella cheese
    • cup grated parmesan cheese
    • 1 cup cottage cheese
    • 1 lb Italian sausage

    Instructions
     

    • Preheat the oven to 350ºF and lightly coat a 9×13-inch baking dish with cooking spray; set aside.
    • Brown the Italian sausage in a large skillet over medium heat, breaking it apart as it cooks; once browned, drain off any excess grease and mix in the spaghetti sauce. Remove from heat and keep warm.
    • In a separate large bowl, combine the cottage cheese, softened cream cheese, sour cream, grated parmesan, parsley, and garlic powder until fully blended. Add the frozen ravioli and gently fold to coat evenly with the cheese mixture.
    • Transfer the ravioli mixture to the prepared baking dish, spreading it into an even layer.
    • Spoon the meat sauce over the ravioli and finish with an even layer of shredded mozzarella on top.
    • Place the casserole uncovered into the oven and bake for 45 minutes, until bubbly and golden. Let rest for 10 to 15 minutes prior to serving.

    Notes

    This dish can be prepared ahead of time and stored in the refrigerator or freezer.
    When baking directly from the fridge, extend the baking time slightly if needed.
    If frozen, thaw completely in the refrigerator before baking as instructed.
  • Kielbasa Sausage Cheesy Potato Casserole

    Kielbasa Sausage Cheesy Potato Casserole

    When it comes to comfort food, Kielbasa Sausage Cheesy Potato Casserole delivers pure satisfaction with every creamy, cheesy, and savory bite. This dish brings the warmth of homestyle cooking straight to your table.

    Perfectly golden potatoes pair with smoky kielbasa and melty cheddar in a rich sauce that bakes into bubbling perfection. It’s the kind of hearty meal that turns any dinner into a cozy, crave-worthy experience.

    Stars of the Show: Main Ingredients in Kielbasa Sausage Cheesy Potato Casserole

    • Kielbasa sausage – Smoked, savory, and full of depth, it infuses every bite with bold, meaty flavor.
    • Potatoes – Diced and tender, they’re the creamy canvas for all that cheesy goodness.
    • Onions – Sautéed until sweet and fragrant, they round out the dish with comforting aroma.
    • Garlic – Just enough to wake up the richness with a sharp, savory kick.
    • Sharp cheddar cheese – Melts beautifully into the sauce, offering sharp, tangy notes that balance the dish.
    • Cheddar cheese soup – Adds velvety texture and a cheesy punch without the need for a roux.
    • Heavy cream & chicken broth – Together, they create a rich, luscious base that keeps everything moist and decadent.

    Let’s Make It: How to Whip Up This Kielbasa Sausage Cheesy Potato Casserole

    Start by browning sliced kielbasa in a bit of water, coaxing out its deep smoky flavors. Once the water evaporates and the sausage caramelizes, toss in diced onions and garlic until they turn soft and aromatic.

    Next, add the diced potatoes and pour in the broth, cream, soup, and seasonings. Let the mixture come to a gentle simmer—just until the edges start to bubble—then stir in the cheddar cheese for that signature creamy texture.

    Pour everything into a baking dish and cover with foil. Bake until the potatoes are fork-tender, then uncover and return to the oven to create that golden, cheesy top layer. The final result? A bubbling, savory casserole with pockets of molten cheese and hearty bites of sausage in every spoonful.

    Recipe Tips & Tasty Twists for Kielbasa Sausage Cheesy Potato Casserole

    Want a spicier kick? Try using hot kielbasa or a dash of cayenne pepper for extra heat. If you’re after more vegetables, stir in some diced bell peppers or frozen peas with the potatoes for added color and texture.

    For a smoky edge, substitute a portion of the cheddar cheese with smoked gouda. This casserole also adapts well to different sausages—Italian, turkey, or even chorizo can completely change the flavor profile without changing the cooking method.

    Making it for a crowd? Double the recipe and bake in two dishes side by side—this one disappears fast!

    Storing It Right: Leftover Love

    Kielbasa Sausage Cheesy Potato Casserole stores like a dream. Once cooled, transfer any leftovers into an airtight container and keep them in the fridge for up to three days. Reheat in the oven at 350°F until warmed through or microwave in individual portions for a quick, satisfying lunch.

    To freeze, portion into freezer-safe containers after baking and cooling. When ready to enjoy, thaw overnight in the fridge and reheat covered in the oven until hot and bubbly. Perfect for meal prep or saving a little homemade comfort for later.

    Kielbasa Sausage Cheesy Potato Casserole

    This indulgent casserole brings together the rich savoriness of kielbasa sausage, the creamy decadence of cheddar-infused sauce, and the tender bite of perfectly cooked potatoes. Designed to offer warmth and satisfaction, this dish is an ideal companion for brisk evenings or any occasion demanding comfort food at its finest.
    Prep Time 30 minutes
    Cook Time 1 hour 25 minutes
    Total Time 1 hour 55 minutes

    Ingredients
      

    • 1 tsp freshly ground black pepper
    • 3 large russet potatoes peeled and diced into ½-inch cubes
    • 1 cup diced yellow onions
    • 1 cup sharp cheddar cheese plus extra for topping if desired
    • ½ cup water with additional as needed in ⅛-cup increments
    • 2 cloves garlic minced finely
    • 10.5 oz can cheddar cheese soup use half
    • 1 tsp Slap Ya Mama® seasoning
    • 1 lb kielbasa sausage sliced ¼-inch thick and each piece quartered
    • 1 cup chicken broth
    • 1 cup heavy cream

    Instructions
     

    • Preheat the oven to 350°F and coat a 13 x 9-inch or 3-quart baking dish with non-stick spray. Set it aside.
    • In a large Dutch oven or stock pot, combine the sliced sausage with ½ cup of water over medium heat. Allow the water to evaporate as the sausage browns; supplement with additional water, ⅛ cup at a time, if necessary.
    • Add the diced onions and continue to cook for 3–4 minutes, then stir in the garlic and cook until the onions become translucent.
    • Incorporate the diced potatoes into the pot. Pour in the chicken broth, heavy cream, half the can of cheddar cheese soup, seasoning, and pepper. Mix thoroughly.
    • Allow the mixture to heat over low until it reaches a low boil, then turn off the heat and stir in the sharp cheddar cheese.
    • Transfer the mixture into the prepared baking dish, spreading evenly. Optionally, sprinkle additional cheese on top.
    • Cover the dish with foil and bake for 65 to 75 minutes, or until the potatoes are tender.
    • Remove the foil and return the dish to the oven for an additional 10 minutes to brown slightly.
    • Carefully take it out of the oven and serve hot.

    Notes

    Substitutions: You may substitute other types of sausage or cheese to suit your taste.
    Make-Ahead: Can be assembled a day ahead and refrigerated until ready to bake.
    Storage: Keep leftovers in an airtight container in the fridge for up to 3 days; reheat as needed.
    Serving Suggestion: Complements well with a crisp green salad or a side of steamed vegetables.