Category: COOKIES

  • Soft Lemon Oatmeal Cookies

    Soft Lemon Oatmeal Cookies

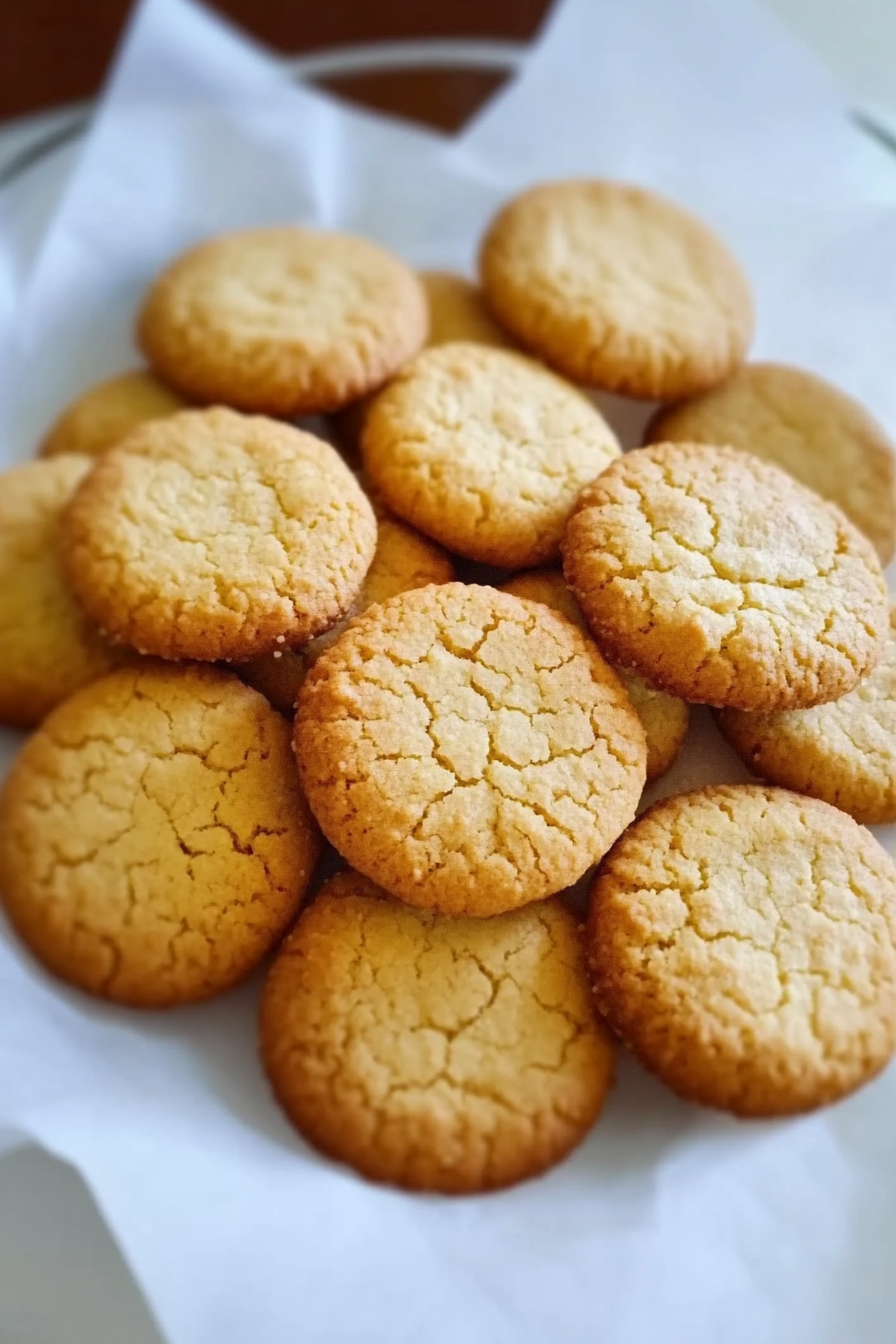
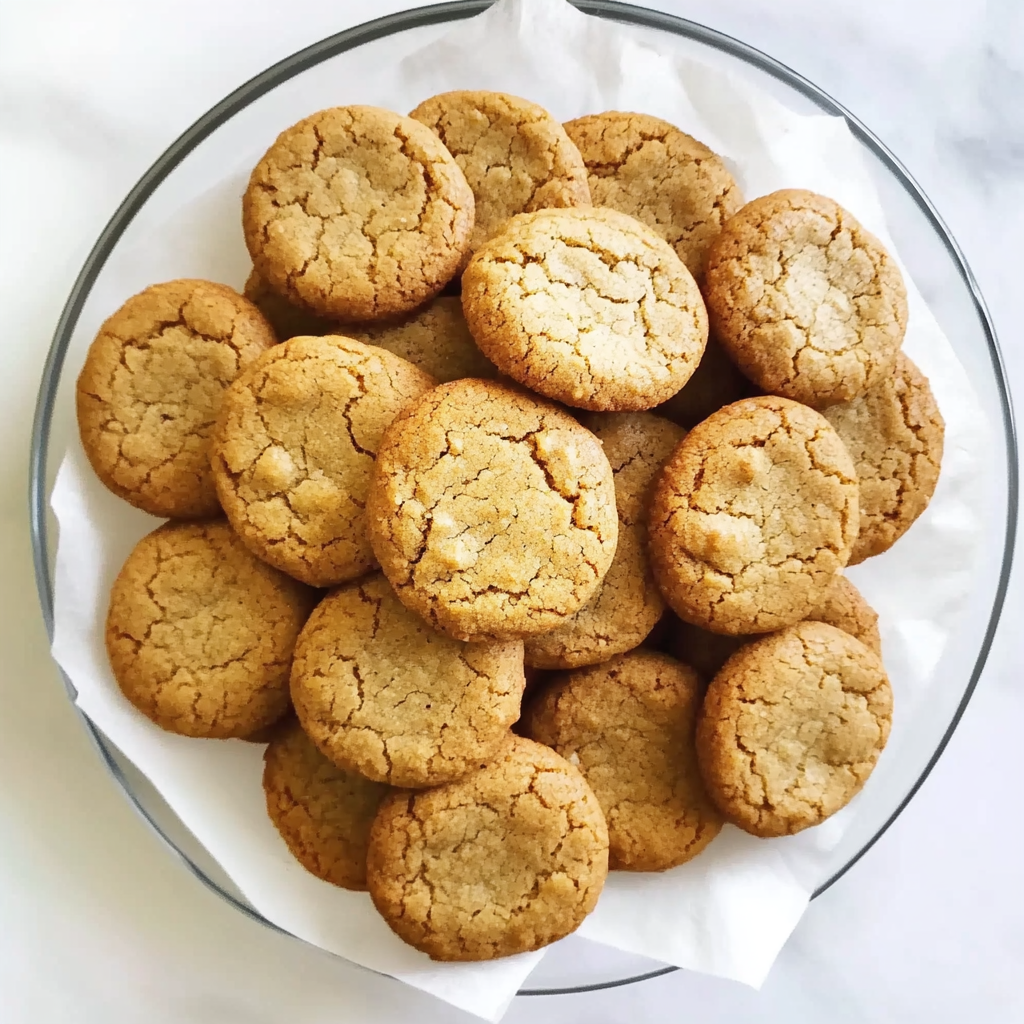
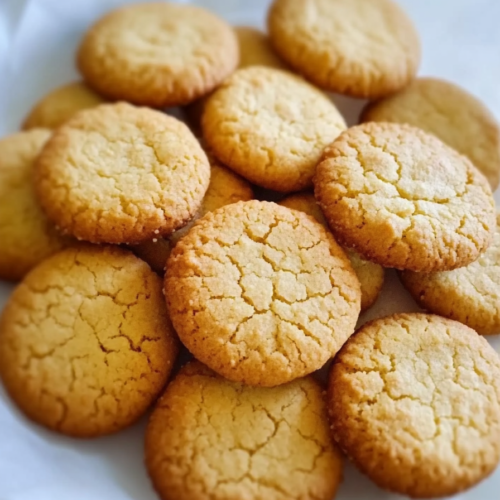
    Soft lemon oatmeal cookies are the perfect balance of bright citrus and comforting chew. These easy-to-make treats are a sunny twist on a classic favorite.

    Each bite delivers a refreshing pop of lemon against the hearty texture of oats, making them ideal for spring gatherings or cozy afternoon snacking.

    Bright & Buttery Ingredients Behind Soft Lemon Oatmeal Cookies

    • Old Fashioned Oats – Brings the chewy, hearty texture that defines these cookies.
    • Unsalted Butter – Provides richness and ensures a soft, tender bite.
    • All Purpose Flour – Gives structure while keeping the cookies soft and thick.
    • Lemon Zest – Adds aromatic, citrusy flavor that makes these cookies sing.
    • Lemon Juice – Infuses each bite with fresh, tangy brightness.
    • Baking Soda – Helps lift the cookies just enough for a light texture.
    • Salt – Balances the sweetness and enhances the citrus flavor.
    • Granulated Sugar – Sweetens and contributes to a crisp edge.
    • Powdered Sugar (for glaze) – Creates a silky lemon glaze that tops off the cookies with a zesty finish.

    How to Make These Zesty Bites

    Start by prepping your trays and preheating the oven to get a jump on things. Cream the butter and sugar until fluffy, then mix in the lemon juice and zest for a citrusy base.

    Gently fold in the dry ingredients, followed by the oats, creating a thick, textured dough. Scoop and flatten the cookies using a sugar-dipped glass for that signature crackled top.

    Bake just until golden and set, about 10 minutes. While they cool, whisk up a tangy glaze of powdered sugar, lemon juice, and zest. Once the cookies are cool, dip the tops in glaze and let them set.

    Tips for Cookie Success & Tasty Variations

    For extra lemon punch, double the zest or add a splash of lemon extract. To keep the cookies ultra-soft, avoid overbaking—they’ll continue to firm up as they cool.

    For a fun twist, stir in white chocolate chips or shredded coconut to complement the lemon. Want a more rustic texture? Swap in quick oats for part of the old fashioned oats.

    For a vegan version, use plant-based butter and a flax egg substitute—the bright lemon flavor still shines through beautifully.

    Storing These Sunshine Cookies Just Right

    Keep these cookies soft and fresh by storing them in an airtight container at room temperature for up to 4 days. To enjoy later, freeze unglazed cookies in a zip-top bag for up to 2 months.

    When ready to serve, thaw and glaze fresh. If you’ve already glazed them, freeze with parchment between layers and let them thaw at room temperature before serving.

    Soft Lemon Oatmeal Cookies

    A tender and citrus-infused treat, these cookies combine the heartiness of oats with the bright tang of lemon, finished with a delicate glaze that enhances their flavor and texture.
    Prep Time 10 minutes
    Cook Time 10 minutes
    Total Time 20 minutes

    Ingredients
      

    • 1 cup unsalted butter softened
    • ¾ teaspoon baking soda
    • 1 cup granulated sugar
    • 1 tablespoon freshly grated lemon zest
    • ¼ teaspoon salt
    • cups old-fashioned oats
    • 1 cup all-purpose flour
    • 2 tablespoons fresh lemon juice

    Glaze:

    • 2 tablespoons lemon zest
    • 3 tablespoons lemon juice
    • ½ cup powdered sugar

    Instructions
     

    • Preheat the oven to 350°F. Prepare baking sheets by lining them with parchment paper or coating with nonstick spray.
    • In a bowl, sift together the all-purpose flour, baking soda, and salt.
    • In a separate mixing bowl, cream the softened butter with the granulated sugar until light and fluffy.
    • Blend in the lemon juice and lemon zest until incorporated.
    • Gradually fold in the dry ingredients, mixing just until combined.
    • Stir in the old-fashioned oats, beating until the dough achieves a uniform consistency.
    • Using a small cookie scoop, portion dough onto the prepared baking trays, spacing evenly.
    • Fill a shallow dish with granulated sugar and another with water. Press a drinking glass into the water, then into the sugar, and use it to gently flatten each dough portion.
    • Bake the cookies for 10 minutes, then transfer to a wire rack to cool.
    • Meanwhile, prepare the glaze by whisking together powdered sugar, lemon juice, and lemon zest in a small bowl until smooth.
    • Once the cookies have fully cooled, dip the tops into the glaze. Allow the glaze to set before serving.
  • Easy No-Bake Samoa Cookies

    Easy No-Bake Samoa Cookies

    These no bake samoa cookies are a deliciously simple, healthier version of the beloved Girl Scouts classic. Packed with real ingredients, they bring that signature caramel-coconut-chocolate flavor without the fuss.

    Enjoy the indulgence of no bake samoa cookies any time of year. They’re gluten-free, vegan, refined sugar-free, and come together with just four main ingredients in minutes.

    Star Players in These No Bake Samoa Cookies

    • Medjool dates – The sweet, sticky base that mimics the chewy caramel flavor without any added sugar.
    • Toasted coconut flakes – Adds that iconic nutty crunch and brings the tropical flavor to life.
    • Almond butter – Offers a rich, creamy texture and subtle nutty depth that holds everything together.
    • Chocolate chips – Melted into silky smooth perfection, they coat and drizzle to complete that Samoa magic.

    How to Make These No Bake Samoa Cookies

    Start by softening the medjool dates if needed—this ensures a perfectly smooth, caramel-like base. Toast the coconut until golden and fragrant to deepen its flavor.

    Blend the dates, almond butter, sea salt, and vanilla extract into a thick paste. Then fold in the toasted coconut until well combined.

    Press the mixture firmly into a silicone donut pan to achieve that classic shape. Freeze until firm.

    Dip each cookie in melted chocolate and give them a chocolatey drizzle on top. Freeze again until set and ready to devour.

    Sweet Tips & Smart Swaps

    For a touch of extra sweetness, a splash of maple syrup can be added—but it’s totally optional. The dates already bring a natural caramel note that’s usually just right.

    If you don’t have a donut pan, shape the mixture into small discs by hand or press it into a mini muffin tin. It won’t change the taste but gives a fun new look.

    Want a nut-free version? Swap almond butter for sunflower seed butter or tahini, keeping the creamy texture with a unique flavor twist.

    Keep ‘Em Fresh: Storing Your No Bake Samoa Cookies

    These cookies are best straight from the freezer, where they stay firm and satisfyingly chewy. Store them in an airtight container and enjoy within a few weeks for optimal texture and taste.

    For a softer bite, let them sit at room temp for a few minutes before eating—but they won’t last long either way!

    No Bake Samoa Cookies

    This wholesome rendition of the beloved Girl Scouts classic offers a no-bake treat that is both gluten-free and vegan, crafted with just four primary ingredients. Free from refined sugars, these cookies are a delightful indulgence that can be enjoyed throughout the year.
    Prep Time 10 minutes
    Freezer 1 hour
    Total Time 1 hour 10 minutes

    Ingredients
      

    • 1 cup toasted coconut flakes
    • 1 cup chocolate chips
    • 1 –2 tablespoons maple syrup optional, for added sweetness
    • 1 cup packed Medjool dates pitted
    • ¼ cup almond butter
    • 1 teaspoon vanilla extract
    • Pinch of sea salt

    Instructions
     

    • If the dates are not naturally soft, place them in a large bowl and pour boiling or very hot water over them until fully submerged. Allow them to soak for 20–30 minutes, then drain thoroughly.
    • Toast the coconut by spreading it evenly on a baking sheet and placing it in a 325°F oven. Stir every 3–4 minutes and toast for 8–10 minutes until golden brown.
    • In a food processor, combine the soaked dates, almond butter, sea salt, and vanilla extract. Blend until the mixture achieves a thick, paste-like consistency. Pause as needed to redistribute if it forms into a ball.
    • Incorporate the toasted coconut into the paste and process briefly until uniformly combined.
    • Press the mixture firmly into the cavities of a silicone donut mold. Transfer the mold to the freezer and chill for 2 hours until fully set.
    • Melt the chocolate chips in a microwave-safe bowl, heating in 30-second intervals and stirring between each until smooth. Line a baking sheet with parchment paper.
    • Carefully remove the chilled cookies from the mold. Dip the base and slightly up the sides of each cookie in the melted chocolate, then place them on the prepared sheet.
    • Drizzle remaining chocolate over the tops of the cookies. Return them to the freezer for 30 minutes until the chocolate has hardened.

    Notes

    These cookies are best served directly from the freezer. Store them in an airtight container for optimal freshness.
  • Butternut Cookies

    Butternut Cookies

    Delicately crisp with a sweet, nutty aroma, Butternut Cookies offer a nostalgic bite of buttery richness and tropical coconut charm baked into every golden round.

    This classic treat is a homemade take on the beloved Butternut Snap, with a soft crunch, sweet treacle notes, and irresistible hints of toasted coconut.

    Star Players in These Butternut Cookies

    • Butter – The heart of the cookie, adding richness and helping to create that signature snap.
    • Sugar – Sweetens the dough and encourages caramelization for a golden finish.
    • Egg – Binds everything together while adding just the right touch of tenderness.
    • Plain flour – Provides structure and gives the cookies their crisp bite.
    • Desiccated coconut – Brings a tropical sweetness and satisfying chew to each bite.
    • Treacle – Deepens the flavor with molasses-like richness and helps with moisture.
    • Cream of tartar and bicarb soda – The leavening duo that creates just the right rise and texture.
    • Vanilla essence – Enhances every other flavor with warm, mellow notes.
    • Salt – Balances the sweetness and sharpens the flavors.

    Quick and Delicious: Making Butternut Cookies

    Start by creaming together the butter and sugar until light and fluffy. Beat in the egg, then swirl in treacle and vanilla for a fragrant base.

    Add a splash of milk, sift in the dry ingredients (except the coconut), and mix until smooth. Fold in the coconut for texture and flavor.

    Roll into small balls, flatten slightly if you like a thinner cookie, then bake until golden. Let them cool and firm up before devouring.

    Tips, Tricks, and Tasty Twists

    For the crispiest edges, don’t skip creaming the butter and sugar thoroughly—this step helps trap air and builds texture. If you want a slightly chewier version, reduce the bake time by a minute or two and leave the cookies thicker when shaping.

    Try swapping treacle with golden syrup for a lighter flavor, or add a pinch of cinnamon for a gentle spice kick. Toasting the coconut beforehand can also enhance its nutty depth, creating an even richer cookie.

    These cookies pair beautifully with tea or coffee, and make a delightful gift when bundled in cellophane and tied with a ribbon.

    Keep ‘Em Crisp: Storing Your Butternut Cookies

    To keep the cookies fresh and crunchy, store them in an airtight container at room temperature for up to one week. If they soften over time, pop them in a 160°C (320°F) oven for 3–5 minutes to revive the snap.

    These cookies also freeze well. Layer them between sheets of baking paper in a sealed container and freeze for up to 3 months. Simply thaw at room temperature before serving—or enjoy straight from the freezer for a chilled crunch.

    Butternut Cookies

    These traditional cookies deliver a delightful fusion of buttery richness and nutty coconut essence. Perfectly crisped on the outside with a soft center, they offer a nostalgic treat that’s both familiar and indulgent.
    Prep Time 20 minutes
    Cook Time 10 minutes
    Total Time 30 minutes

    Ingredients
      

    • 1 cup desiccated coconut
    • ½ teaspoon cream of tartar
    • 1 tablespoon milk
    • 1 cup sugar
    • 1 egg
    • 2 tablespoons butter
    • ½ teaspoon vanilla essence
    • 1 teaspoon salt
    • 2 tablespoons treacle
    • 1 teaspoon bicarb soda
    • 1 ½ cups plain flour

    Instructions
     

    • Cream together the butter and sugar until light and smooth.
    • Incorporate the beaten egg, treacle, and vanilla essence into the mixture, blending thoroughly.
    • Add the milk, then sift in the cream of tartar, bicarb soda, salt, and plain flour. Stir until a cohesive dough forms.
    • Stir in the desiccated coconut and mix until evenly distributed.
    • Shape the dough into small balls and place them on a greased baking sheet. Lightly flatten each ball with your fingers for a thinner finish, if preferred.
    • Bake in a moderately hot oven for approximately 10 minutes, or until golden.
    • Let the cookies cool completely before serving or storing.
  • Buttery Toffee Icebox Cookies

    Buttery Toffee Icebox Cookies

    Buttery, crisp, and dotted with rich toffee bits, Toffee Butter Icebox Cookies are a dream for dessert lovers. Their slice-and-bake style makes them the ultimate make-ahead treat.

    These cookies are perfect for holiday spreads, cookie exchanges, or last-minute cravings. With just a handful of pantry staples, they’re as easy to prepare as they are to devour.

    The Magic Behind These Cookies: Key Ingredients for Toffee Butter Icebox Cookie

    • Butter – The heart of these cookies, lending richness and that classic melt-in-your-mouth texture.
    • Sugar – Sweetens the dough and helps create that irresistible golden edge.
    • Egg – Binds everything together while adding just the right amount of tenderness.
    • Vanilla Extract – Enhances the buttery base with warm, comforting depth.
    • All-Purpose Flour – Forms the sturdy, sliceable dough that’s essential for icebox cookies.
    • Heath Toffee Bits – Crunchy, buttery toffee pieces in every bite, giving these cookies their signature twist.

    How to Make Them: From Dough to Golden-Baked Delight

    Start by creaming the butter and sugar until fluffy. Mix in the egg and vanilla until smooth. Stir in the flour gradually to form a dough, adding a touch of water if needed.

    Fold in the toffee bits, then shape the dough into logs and wrap in plastic wrap. Chill until firm—this step is key for clean slicing and even baking.

    Once chilled, slice the dough into rounds and arrange on a parchment-lined baking sheet. Bake until lightly golden around the edges, then let them cool slightly before digging in.

    Cookie Confidence: Tips & Twists for Toffee Butter Icebox Cookies

    For extra crunch, roll the dough logs in turbinado sugar before slicing. It creates a sparkly, crisp edge that elevates presentation and flavor.

    If you love nuts, chopped pecans or almonds blend beautifully with the toffee bits. Or take a chocolatey route—dip half of each baked cookie in melted dark chocolate and let them set for an elegant finish.

    Chilling the dough is non-negotiable—don’t skip it! It keeps the cookies from spreading and helps develop that signature icebox texture.

    Sweet Storage Secrets: Keeping Toffee Butter Icebox Cookies Fresh

    These cookies keep wonderfully at room temperature for up to five days when stored in an airtight container. For longer storage, freeze baked cookies in layers between parchment paper.

    To make ahead, freeze the dough logs tightly wrapped. When the craving hits, slice and bake straight from the freezer—no thawing needed. Just add a minute or two to the baking time.

    Toffee Butter Icebox Cookies are the perfect marriage of buttery cookie and crunchy toffee, ready to become your new favorite bite-sized indulgence.

    Buttery Toffee Icebox Cookies

    Delicately crisp and rich with buttery flavor, these Toffee Butter Icebox Cookies feature a delightful crunch of Heath toffee bits in every mouthful. Simple to prepare and ideal for make-ahead baking, they are a charming addition to holiday platters or a convenient treat any day of the week.
    Prep Time 15 minutes
    Cook Time 8 minutes
    Chill time 1 hour
    Total Time 1 hour 23 minutes

    Ingredients
      

    • 1 cup Heath toffee bits
    • 1 tsp vanilla extract
    • 1 egg brought to room temperature
    • cups all-purpose flour accurately spooned and leveled
    • 1 cup granulated sugar
    • 1 cup unsalted butter softened

    Instructions
     

    • Cream the butter and sugar in a mixing bowl until smooth and fluffy.
    • Incorporate the egg and vanilla extract, blending thoroughly.
    • Gradually add the flour to the wet mixture, mixing until the dough becomes cohesive. If the mixture is overly crumbly, introduce water in small increments—one teaspoon at a time—until the dough binds properly.
    • Fold the toffee bits into the dough evenly.
    • Split the dough into two portions and place each on plastic wrap. Shape each segment into a cylindrical log approximately 6 inches in length and 1.5 inches in diameter. Wrap securely and refrigerate until firm, about 1 to 2 hours.
    • Set the oven to 375°F and prepare a baking sheet with parchment paper.
    • Remove the dough from the refrigerator, unwrap, and slice into ¼-inch rounds.
    • Arrange the cookies on the baking sheet, spacing them roughly 2 inches apart.
    • Bake for 8 minutes or until edges are lightly golden.

    Notes

    Storage: Maintain freshness by storing cookies in an airtight container at room temperature for up to 5 days.
    Freezing: Extend shelf life by freezing cookies in layers separated by parchment paper, enclosed in a freezer-safe container or bag, for up to 3 months.
    Make-Ahead Tip: Dough logs can be frozen in plastic wrap for up to 3 months. Slice and bake straight from the freezer as needed—no thawing necessary.