Category: RECIPES

  • Homemade Maple Donut Bars

    Homemade Maple Donut Bars

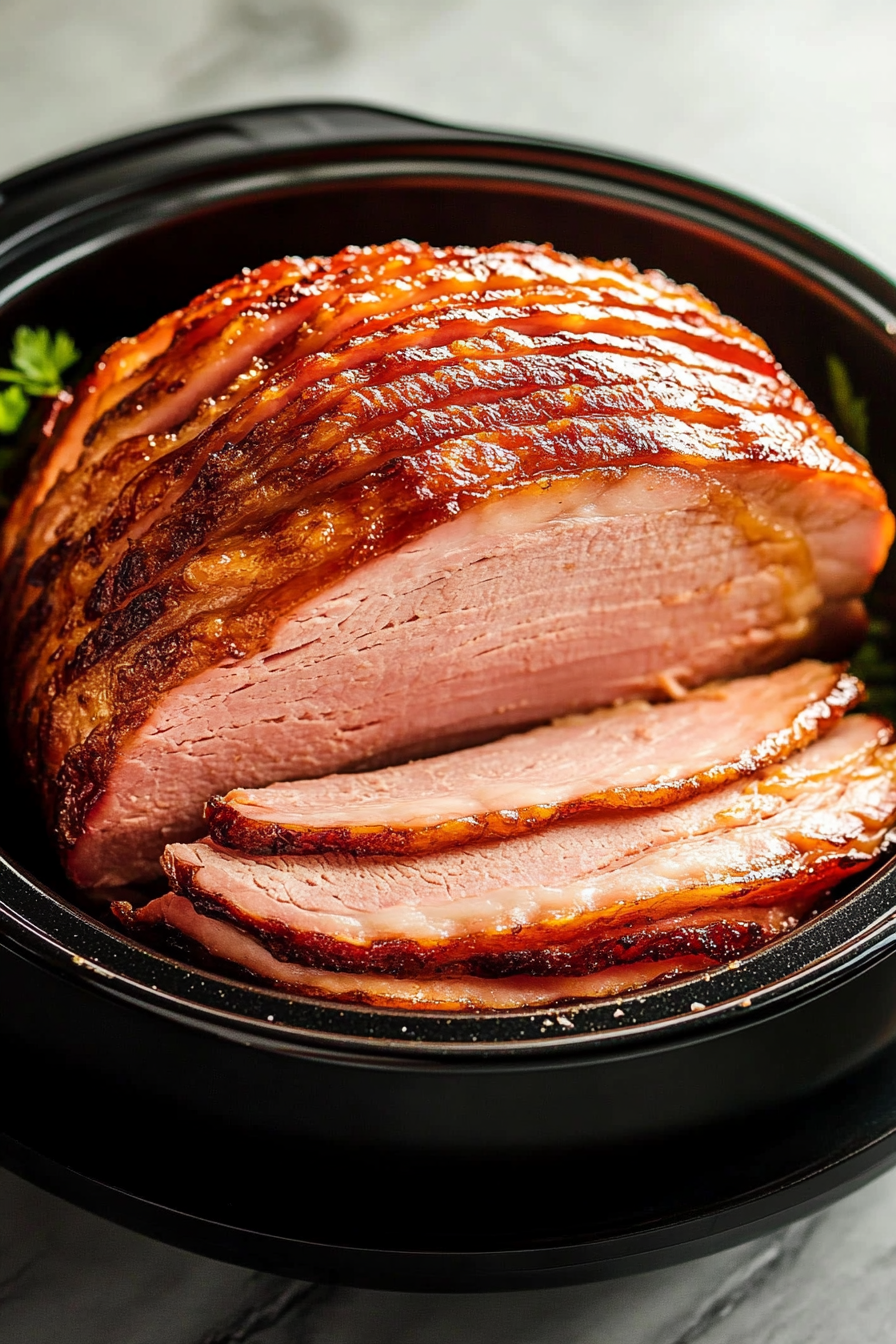
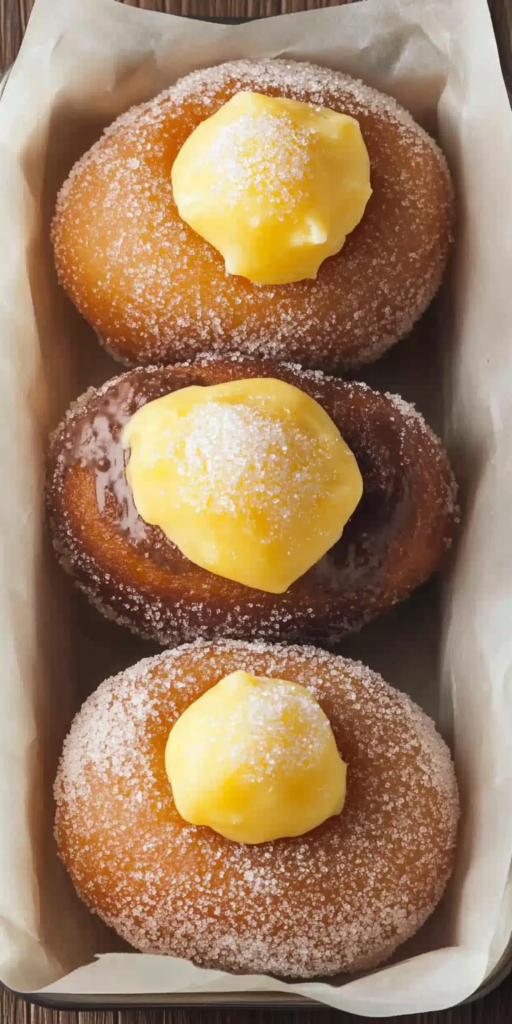
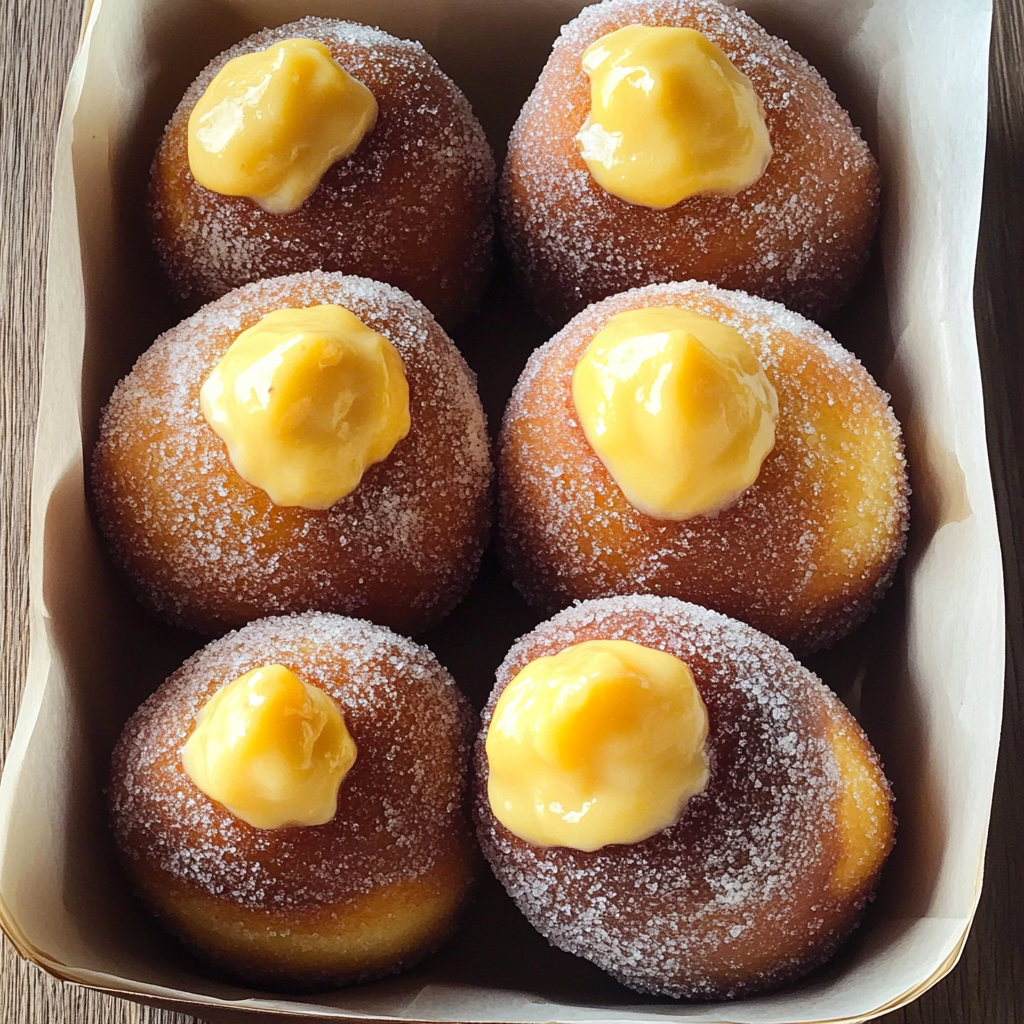
    Fluffy, sweet, and glazed to golden perfection, this maple bar donut recipe brings the beloved West Coast bakery classic to your home kitchen. Each bite delivers soft, chewy bliss.

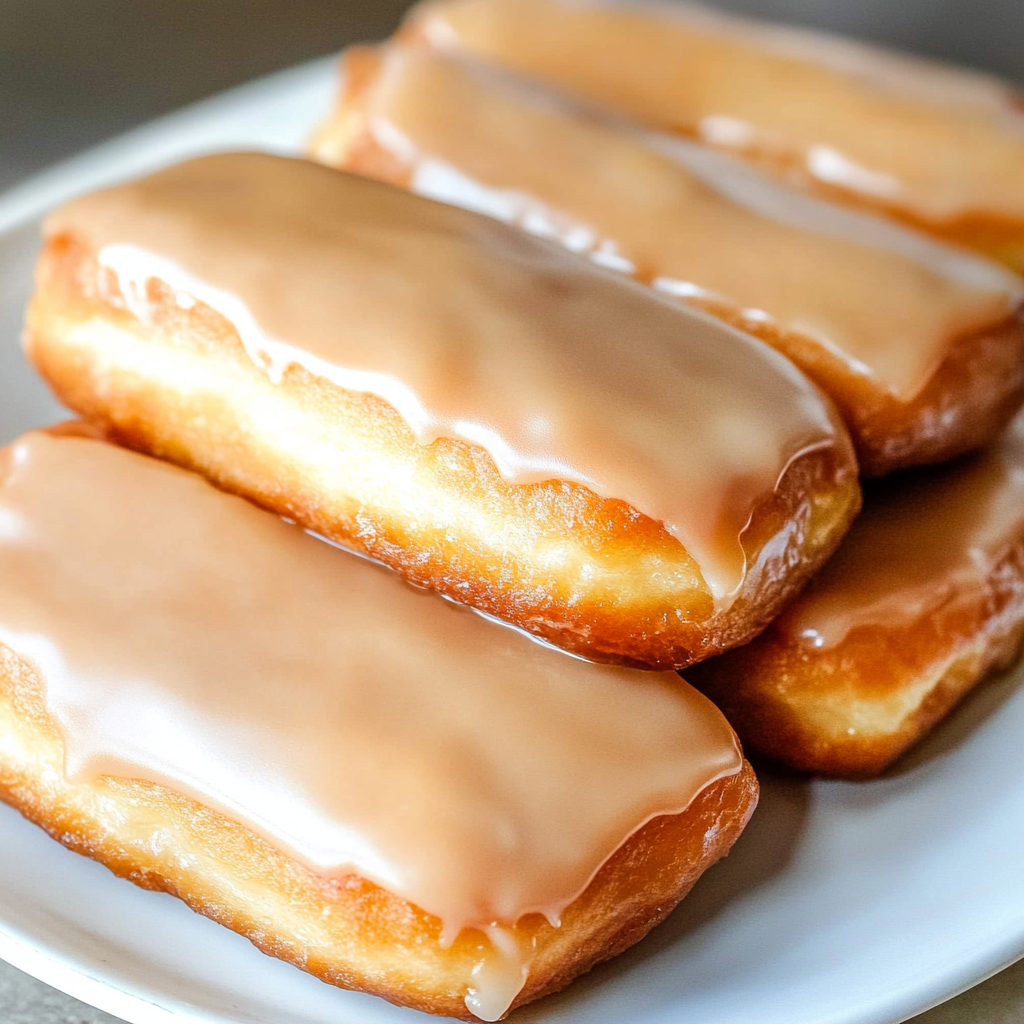
    These rectangular yeast-raised donuts are dipped in a rich maple glaze that sets with a satisfying sheen. Perfect with morning coffee or as a nostalgic afternoon treat.

    What You’ll Need for Perfect Maple Bar Donuts

    • Bread flour – Provides the high gluten content needed for that ideal chewy-yet-airy donut texture.
    • Active dry yeast – The leavening powerhouse that gives these donuts their signature rise and pillowy softness.
    • Egg yolks – Adds richness, color, and softness to the dough, making every bite more indulgent.
    • Shortening – Helps create a tender crumb while maintaining the structure during frying.
    • Maple extract – The star of the glaze, delivering that unmistakable warm, woodsy sweetness that defines a true maple bar.
    • Powdered sugar – The base of the glaze, it melts smoothly and sets beautifully over cooled donuts.
    • Peanut oil – Ideal for frying thanks to its neutral flavor and high smoke point, resulting in crisp, golden donuts.

    How to Make Maple Bar Donuts: A Sweet Journey

    Start by activating the yeast with warm water and a bit of sugar. Once bubbly, blend in the remaining sugar, shortening, yolks, and vanilla. Add flour, salt, and baking powder, mixing until a sticky dough forms. Knead until smooth.

    Shape the dough into a square and let it rise in a warm, steamy oven setup until doubled. Roll it out gently and slice into rectangles, then allow a second rise for maximum puff.

    Heat the peanut oil and fry in small batches until golden and tender. Cool completely. Whisk together the maple glaze, adjusting thickness with water or sugar to get that perfect dip. Dunk each bar top-down and let the glaze set before serving.

    Pro Tips for the Fluffiest, Glossiest Maple Bars

    Proofing is everything—don’t rush it. Using a warm, humid oven environment ensures optimal rise and a lighter donut. Be gentle when handling the dough post-rise; even small pokes can deflate the delicate air pockets you’ve worked so hard for.

    When frying, maintain a consistent oil temperature. Too cool and the donuts soak up oil; too hot and they brown before cooking through. And always wait until the donuts are completely cooled before glazing—warm donuts will cause the icing to slide right off.

    Customize your glaze by adjusting the maple extract to taste. For a deeper flavor, consider adding a touch of brown butter or a pinch of cinnamon.

    Keeping Them Fresh: How to Store Maple Bar Donuts

    These maple bar donuts are best enjoyed the day they’re made, but they’ll keep their magic for up to three days. Store in an airtight container at room temperature to maintain softness.

    If you’d like to freeze them, skip the glaze and wrap the donuts tightly. Once thawed, dip in fresh glaze to bring them back to life. To reheat, a quick 10 seconds in the microwave softens them up nicely—just avoid overheating, which can toughen the texture.

    Maple Bar Donut Recipe

    A classic Western delight, these Maple Bar Donuts boast a pillowy, yeasted interior encased in a golden exterior and crowned with a rich maple glaze. Their signature rectangular form and sweet, flavorful topping make them a sought-after treat that you can now recreate in your own kitchen with ease.
    Prep Time 30 minutes
    Cook Time 2 minutes
    Rising Time 2 hours
    Total Time 2 hours 32 minutes

    Ingredients
      

    For the Dough

    • 3 large egg yolks
    • teaspoons kosher salt
    • 3 tablespoons active dry yeast
    • cups bread flour spooned and leveled, up to 4 cups if needed
    • 1 teaspoon vanilla extract
    • 1 tablespoon granulated sugar
    • ½ teaspoon baking powder
    • ½ cup granulated sugar
    • 1 cup warm water approximately 105°F
    • ¼ cup butter-flavored shortening or plain shortening
    • Peanut oil for frying approximately 48 ounces

    For the Maple Icing

    • ½ teaspoon vanilla extract
    • 1 teaspoon maple extract adjust to taste
    • cup hot water with more as needed
    • 2 teaspoons light corn syrup
    • ¼ teaspoon kosher salt
    • 4 cups powdered sugar plus an additional ½ cup if needed

    Instructions
     

    • In the bowl of a stand mixer or a large mixing bowl, combine the warm water, yeast, and 1 tablespoon of sugar. Let the mixture sit until foamy, around 5 minutes. If it doesn’t foam, the yeast is inactive and should be replaced.
    • Add the remaining ½ cup sugar, shortening, egg yolks, and vanilla to the foamed yeast. Mix using the paddle attachment until the shortening is dispersed but not fully incorporated.
    • Sprinkle in 1 cup of the flour, followed by the salt and baking powder. Lightly stir the dry ingredients into the flour before incorporating them into the dough. Beat for 1 minute until fully integrated.
    • Continue adding the remaining flour, 1 cup at a time. Switch to the dough hook or knead by hand once the mixture becomes too thick. Knead for about 5 minutes until the dough is smooth and pulls away from the bowl. A slightly sticky dough is preferred for a tender result—only add additional flour if absolutely necessary.
    • Bring at least 2 quarts of water to a boil in a large pot. Lightly flour a baking sheet (avoid silicone mats). Shape the kneaded dough into a ball, transfer it to the sheet, then flatten it into a 6×6 inch square. Lightly dust the top with flour and cover with a cloth.
    • Warm the oven by turning it on to 350°F for 30 seconds, then switch it off. Place the dough inside the oven on a rack above a 9×13 inch pan filled with the boiling water. Allow it to rise in this humid environment for 1 hour until doubled.
    • Once risen, remove the dough and transfer it gently onto a floured surface. Use a rolling pin to flatten into an 11×12 inch rectangle. Slice the dough into four quarters, then divide each quarter into three long rectangles to yield 12 donuts. Trim edges for uniformity if desired.
    • Transfer the shaped dough to two floured baking sheets, spacing each piece at least 2 inches apart. Reheat the oven as before and repeat the steam method using boiling water in a 9×13 inch pan. Let the dough rise again for 45 minutes or until doubled.
    • Fifteen minutes before the second rise ends, heat about 2 inches of peanut oil in a deep, heavy pot to 350°F, monitoring with a candy thermometer.
    • Carefully lower 2–3 dough pieces at a time into the hot oil using a spatula or scraper. Fry each side until golden, approximately 30–40 seconds on the first side and 20 seconds on the other. Transfer to paper towels to drain and let cool completely before glazing.
    • In a mixing bowl, whisk together the powdered sugar, corn syrup, salt, vanilla, maple extract, and hot water. Adjust consistency with additional sugar or water as needed. The glaze should be thin enough for dipping but not runny.
    • Dip the smooth side of each cooled donut into the glaze and allow excess to drip off. Place on a wire rack to set for 15–20 minutes before serving.

    Notes

    *All-purpose flour can be used in place of bread flour, though the texture may be slightly less chewy.
    *Peanut oil may be reused—strain and store in its original container after cooling.
  • Impossible Cheeseburger Pie

    Impossible Cheeseburger Pie

    Impossible Cheeseburger Pie is the perfect fusion of comfort food and weeknight convenience that brings bold, cheesy, and beefy flavor in every bite.

    This hearty, satisfying dish is a retro favorite that never goes out of style—easy to whip up, endlessly customizable, and always a crowd-pleaser.

    What You’ll Need for This Impossible Cheeseburger Pie

    • Lean ground beef – Savory and hearty, it forms the meaty base of this pie and pairs perfectly with melted cheese.
    • Sweet onion – Adds a gentle sweetness and depth that balances the richness of the beef and cheese.
    • Cheddar cheese – Melts into gooey perfection, delivering sharp, creamy goodness throughout the dish.
    • Milk – Combines with the Bisquick to create a light, quiche-like texture.
    • Onion soup mix – A pantry powerhouse that brings bold, savory depth with zero effort.
    • Bisquick – The “impossible” magic that binds the filling into a tender, crustless pie.
    • Eggs – Help the pie set and give it a satisfying, custardy structure.

    How to Make This Retro Favorite

    Start by browning the beef and onions until fully cooked and fragrant, then drain off any grease. This forms the flavorful foundation of the dish.

    Layer the mixture into a greased pie dish and generously sprinkle with shredded cheddar cheese.

    Whisk together milk, Bisquick, eggs, and onion soup mix until smooth, then pour it evenly over the meat and cheese.

    Bake until golden and set—about 25 minutes. Let it cool just slightly before slicing into cheesy, beefy perfection.

    Tips & Tasty Twists to Try

    For extra flavor, try swapping the cheddar with pepper jack or a smoked gouda. A dash of hot sauce in the batter adds just the right kick if you’re feeling spicy.

    Want a little veggie action? Stir in chopped bell peppers or mushrooms with the beef and onion. Bacon lovers can also toss in crumbled cooked bacon for a cheeseburger pie that leans into indulgence.

    This recipe can easily be doubled for a crowd—just use a 9×13 baking dish instead of a pie pan. Leftovers are just as tasty, making it a smart make-ahead option.

    Keep It Fresh: Storing & Reheating

    To store leftovers, wrap the pie tightly or place slices in an airtight container in the fridge for up to 3 days.

    For freezing, wrap individual slices in plastic wrap and then foil, or store in a freezer-safe container for up to 2 months.

    Reheat in the oven at 350°F until warmed through, or microwave in 30-second bursts until hot. For best texture, skip the microwave when possible and opt for the oven.

    Impossible Cheeseburger Pie

    A delightfully simple dish packed with hearty beef and rich cheesy goodness, this savory pie is a crowd-pleaser that comes together quickly and satisfies every time.
    Prep Time 10 minutes
    Cook Time 25 minutes
    Total Time 35 minutes

    Ingredients
      

    • 1 cup shredded cheddar cheese
    • ½ cup Bisquick
    • 2 tablespoons onion soup mix
    • 1 cup chopped sweet onion
    • 1 pound lean ground beef
    • 2 large eggs
    • 1 cup milk

    Instructions
     

    • Preheat your oven to 400°F. In a large skillet over medium heat, combine the ground beef and chopped onion, cooking until the meat is fully browned and the onion is tender. Drain any excess grease and transfer the mixture into a greased 9-inch pie dish, spreading it evenly.
    • Evenly scatter the shredded cheddar cheese over the beef layer.
    • In a separate bowl, whisk together the milk, eggs, Bisquick, and onion soup mix until fully blended. Carefully pour this mixture over the contents in the pie plate.
    • Place the dish in the oven and bake for 25 minutes, or until the center is set and the top is golden. Allow the pie to cool slightly before slicing and serving.

    Notes

    This dish can be easily doubled for larger gatherings. Serve with a side salad or steamed vegetables for a complete meal.
  • Easy Ravioli Sauce

    Easy Ravioli Sauce

    This easy ravioli sauce is creamy, rich, and bursting with bold tomato flavor—perfect for elevating store-bought ravioli into something truly memorable. It’s a weeknight dinner hero in disguise.

    With a velvety blend of half and half, cream cheese, and Parmesan, this sauce clings to every bite. A touch of tomato paste and herbs brings out that comforting Italian flavor we all crave.

    Flavor-Packed Ingredients That Make This Easy Ravioli Sauce Shine

    • Salted butter – Starts the sauce with a rich, savory base and helps develop depth.
    • Garlic – Adds a bold, aromatic kick right from the start.
    • Tomato paste – Intensifies the tomato flavor and deepens the color of the sauce.
    • Chicken broth – Balances creaminess with a light, savory foundation.
    • Half and half – Creates the luxurious texture without overwhelming heaviness.
    • Rotel tomatoes – Bring brightness and a subtle kick with green chilies.
    • Cream cheese – Adds a silky, tangy touch that enhances the sauce’s creaminess.
    • Parmesan cheese – Infuses the sauce with salty, umami-rich depth.
    • Refrigerated ravioli – The ultimate shortcut—plush pockets of flavor made even better with this creamy coating.

    How to Make It: Creamy Comfort in Every Bite

    Melt the butter in a skillet, then add garlic for instant aromatic warmth. Stir in flour to create a roux, then whisk in tomato paste and seasonings for a flavor boost.

    Next, slowly add chicken broth and half and half, whisking as the sauce thickens into a creamy dream. Stir in cream cheese and Rotel tomatoes, letting them melt into the base.

    While the sauce simmers, cook your ravioli to al dente perfection. Reduce heat, stir in Parmesan cheese, and a pinch of red pepper flakes for a hint of heat.

    Toss in the ravioli and gently stir to coat. Add reserved tomato juice if needed for a looser consistency. Serve immediately and savor every creamy, cheesy forkful.

    Tips & Tasty Tweaks for Sauce Success

    Let the cream cheese come to room temperature before mixing—it blends easier and melts faster. A quick microwave trick works wonders if you’re short on time.

    Use freshly grated Parmesan for the best flavor and smoothest melt. Avoid the pre-shredded kind, which can be gritty and less flavorful.

    For a veggie boost, stir in a handful of fresh spinach or torn basil just before serving. The greens wilt beautifully in the hot sauce and add color and freshness.

    Prefer a bit more kick? A dash of hot sauce or extra red pepper flakes does the trick without overpowering the dish.

    You can also swap in tortellini for ravioli if that’s what’s in your fridge—this sauce plays well with either.

    Keep It Fresh: How to Store Leftovers

    Store leftover ravioli and sauce in an airtight container in the fridge for up to three days. The sauce stays creamy and flavorful with a gentle reheat on the stove or microwave.

    If you plan to freeze leftovers, keep in mind the texture of the ravioli may soften. For best results, freeze the sauce separately and add fresh-cooked pasta when ready to enjoy.

    Easy Ravioli Sauce

    A creamy, richly seasoned sauce crafted to complement both refrigerated and frozen ravioli. Infused with a subtle tomato essence, aromatic herbs, and the warmth of softened cheese, this simple yet flavorful dish delivers a restaurant-quality meal in just half an hour.
    Prep Time 15 minutes
    Cook Time 15 minutes
    Total Time 30 minutes

    Ingredients
      

    • ¾ cup chicken broth
    • 3 tablespoons salted butter
    • ½ teaspoon dried oregano
    • ½ teaspoon onion powder
    • 1 tablespoon tomato paste
    • 10 oz. Rotel tomatoes with green chilies juices reserved
    • 1 pinch red pepper flakes optional
    • ½ teaspoon mustard powder
    • ½ teaspoon dried basil
    • 3 tablespoons cream cheese softened
    • 1/3 cup Parmesan cheese grated
    • 2 tablespoons all-purpose flour
    • 1 ½ cups half and half
    • 3 cloves garlic minced
    • 20 oz. refrigerated ravioli

    Instructions
     

    • Measure all components before starting.
    • In a large, high-sided skillet over medium-low heat, melt the butter. Incorporate the minced garlic and sauté for 2 minutes, stirring continuously. Add flour and continue to stir for another 2 minutes to form a roux. Blend in the tomato paste along with onion powder, basil, oregano, and mustard powder.
    • Gradually pour in the chicken broth, stirring as you go to maintain a smooth consistency. Add the half and half using the same method. Allow the mixture to come to a gentle boil, then lower the heat to a simmer.
    • Stir in the softened cream cheese followed by the drained diced tomatoes. Reserve the tomato juices to adjust the sauce’s thickness later if needed.
    • Meanwhile, cook the ravioli according to package directions and drain.
    • Reduce the sauce to low heat, then slowly fold in the grated Parmesan cheese, stirring until fully melted. Add red pepper flakes if a touch of heat is desired.
    • Gently incorporate the cooked ravioli using a silicone spatula, ensuring even coating. If a thinner consistency is preferred, stir in reserved tomato juice. Serve warm.

    Notes

    Fresh or canned diced Roma tomatoes may substitute the Rotel.
    A small amount of hot sauce adds flavor without overwhelming heat.
    Enhancements like fresh basil or spinach are excellent optional additions.
    Tortellini can be used in place of ravioli for variation.
    Grating Parmesan from a block significantly improves melt and flavor.
    To quickly soften cream cheese, microwave a bowl of water, then place the cream cheese inside the microwave with the water for 5 minutes (without turning it on).
    Store leftovers in an airtight container in the fridge for up to 3 days. Freezing is possible but may alter texture.
  • Slow Cooker Honey Glazed Ham

    Slow Cooker Honey Glazed Ham

    Tender, sweet, and impossibly juicy, this slow cooker ham is the ultimate fuss-free centerpiece for your holiday feast or Sunday supper.

    Simmered in a rich brown sugar and honey glaze, the spiral-cut ham absorbs deep flavor with minimal effort and maximum reward.

    What You’ll Need for This Slow Cooker Ham

    • Bone-in spiral cut ham (8 lb.) – The star of the show; pre-sliced for easy serving and perfect for absorbing flavor from the glaze.
    • Brown sugar (½ cup) – Brings a deep molasses sweetness that caramelizes as it cooks.
    • Honey (½ cup) – Adds floral notes and balances the saltiness of the ham with sticky sweetness.
    • Dijon mustard (¼ cup) – Cuts through the sweetness with a tangy bite that enhances the overall glaze.
    • Ground cinnamon (¼ teaspoon) – Offers subtle warmth and a touch of holiday spice.
    • Ground cloves (¼ teaspoon) – Adds depth and earthiness that complements both the meat and the glaze.
    • Water (½ cup) – Helps to dissolve the glaze ingredients and ensures moisture during the slow cooking process.

    How to Make This Irresistible Slow Cooker Ham

    Start by placing the ham cut-side down in the slow cooker, trimming if needed to fit snugly with the lid closed.

    Next, make the glaze by heating the brown sugar, honey, mustard, spices, and water until smooth and glossy. Pour it generously over the ham.

    Cover and cook on LOW for 4 to 6 hours, basting occasionally for maximum flavor infusion. Once done, the ham should reach an internal temp of 140°F.

    For an optional finishing touch, reduce the leftover glaze on the stovetop to a syrupy consistency and drizzle over the ham before serving.

    Pro Tips to Make Your Slow Cooker Ham Shine

    For even cooking, make sure the ham fits well inside your slow cooker—trim a portion if necessary, then tuck it alongside the main cut. Basting once per hour helps layer on flavor and keeps the ham juicy throughout.

    Using Dijon mustard might seem unusual, but it balances the sweetness with a tang that keeps the glaze from being cloying. For an extra depth of flavor, swap in maple syrup for half the honey or use a touch of apple cider in place of water.

    For a beautifully browned top, pop the cooked ham under the broiler for 2–3 minutes just before serving. The glaze will caramelize and add a gorgeous finish.

    How to Store and Reheat Your Slow Cooker Ham

    Cool any leftovers completely before storing in an airtight container in the fridge for up to four days.

    To freeze, slice the ham and store it with a bit of glaze in a freezer-safe bag or container for up to four months. Reheat gently in the microwave or oven, adding a splash of water or broth to keep it moist.

    Leftover ham also makes incredible sandwiches, soups, and breakfast scrambles—don’t let a single slice go to waste!

    Slow Cooker Honey Glazed Ham

    A remarkably effortless way to prepare a festive ham, this slow cooker version yields succulent results with minimal oversight. Infused with a spiced honey-brown sugar glaze, the ham emerges exceptionally tender and richly flavored—ideal for holiday gatherings or celebratory feasts.
    Prep Time 15 minutes
    Cook Time 4 hours
    Total Time 4 hours 15 minutes

    Ingredients
      

    • ¼ teaspoon ground cloves
    • 8 lb. bone-in spiral-cut ham
    • ½ cup water
    • ¼ teaspoon ground cinnamon
    • ½ cup honey
    • ¼ cup dijon mustard
    • ½ cup brown sugar

    Instructions
     

    • Lightly coat the inside of the slow cooker with cooking spray. Position the ham inside the cooker with the cut side facing downward. Place the lid on top to confirm that the ham fits snugly; if the lid doesn’t close properly, trim a small portion from the top of the ham and nestle it beside the main portion.
    • In a medium saucepan, blend together the brown sugar, honey, water, dijon mustard, cinnamon, and cloves. Warm over medium heat, stirring occasionally, until the sugar is fully dissolved, approximately 5 minutes. Evenly pour this glaze over the ham.
    • Secure the lid and set the cooker to LOW. Let the ham cook undisturbed for 4 to 6 hours, spooning the juices over the meat once every hour during the cooking process. Ensure the internal temperature reaches a minimum of 140°F (60°C) before serving.
    • For a thicker glaze, pour the cooking liquid into a saucepan and simmer over medium heat, stirring continuously until it reaches the desired consistency.

    Notes

    Store any remaining ham in the refrigerator within two hours of cooking. It may be refrigerated for up to 4 days or frozen for a maximum of 4 months.
  • Old Fashioned Penuche Fudge Recipe

    Old Fashioned Penuche Fudge Recipe

    Old fashioned penuche fudge recipe captures that nostalgic, caramel-kissed sweetness with a buttery richness that simply melts on the tongue. This timeless treat only needs five simple ingredients.

    Perfect for holidays or sweet cravings, this creamy, brown sugar fudge delivers old-school charm with every bite. Add nuts for texture or enjoy it smooth—either way, it’s irresistible.

    Sweet Simplicity: Key Ingredients in This Old Fashioned Penuche Fudge Recipe

    • Light brown sugar – Delivers that signature caramel flavor and chewy texture.
    • Granulated white sugar – Helps balance the depth of molasses from the brown sugar.
    • Whole milk – Provides the creamy base that makes the fudge smooth and luscious.
    • Unsalted butter – Adds rich flavor and silky finish when beaten in at the end.
    • Pure vanilla extract – Enhances the butterscotch notes and rounds out the sweetness.

    How to Make Penuche Fudge: A Quick Peek into the Process

    Start by combining the sugars and milk in a heavy saucepan, bringing the mixture to a boil with constant stirring. Once it boils, stop stirring to avoid gritty fudge.

    Let it cook undisturbed to the soft-ball stage—236°F—then remove from heat and add butter and vanilla without mixing. Let it cool to 110°F before beating it into a creamy fudge.

    Once thickened, pour into a buttered pan before it hardens. Optional chopped nuts can be folded in just before pouring. Let the fudge cool completely, then cut into squares and enjoy.

    Sweet Tips for Success & Flavorful Variations

    Temperature control is everything when it comes to perfect penuche fudge. Don’t stir once the mixture starts to boil—this prevents the formation of large sugar crystals and keeps the fudge smooth.

    Use a candy thermometer for accuracy, or the old-fashioned cold water test to find the soft-ball stage. If the fudge turns dry or chalky, don’t worry—just reheat it with a bit of milk or water and bring it back to 236°F slowly, then try again.

    Add-ins like chopped pecans or walnuts bring a delightful crunch that contrasts the smoothness of the fudge. A pinch of sea salt or swirl of maple extract can also elevate the flavor.

    Storing Sweetness: Keep That Fudge Fresh

    To keep your penuche fudge soft and flavorful, store it in an airtight container in the refrigerator. Layer squares with parchment paper to prevent sticking.

    For longer storage, wrap tightly in plastic wrap and freeze for up to three months. Thaw at room temperature before serving for the best texture and flavor.

    Old Fashioned Penuche Fudge

    A timeless confection, this old fashioned penuche fudge delivers a luscious, buttery sweetness that melts exquisitely on the tongue. Crafted with only five primary ingredients and the optional crunch of nuts, it’s a classic treat perfect for any dessert table.
    Prep Time 30 minutes
    Cook Time 15 minutes
    Total Time 45 minutes

    Ingredients
      

    • 3 tablespoons unsalted butter solid and optionally cut into chunks
    • 2 cups granulated sugar
    • 1 cup light brown sugar firmly packed
    • 1 cup whole milk
    • 1 ½ teaspoons pure vanilla extract
    • Optional: 1 cup pecans or walnuts coarsely chopped

    Instructions
     

    • In a 3-quart saucepan, mix both sugars with the whole milk and place over medium-high heat. Stir continuously until the mixture begins to boil, then immediately cease stirring to prevent sugar crystals from forming.
    • Lower the heat to medium and allow the mixture to cook undisturbed until it reaches 236°F (113°C), the soft-ball stage.
    • Remove the saucepan from the heat and carefully add the solid butter along with the vanilla extract. Refrain from stirring at this point. Let the mixture rest until it cools to 110°F (43°C), checking the temperature after 10 minutes and then every 5 minutes thereafter.
    • Meanwhile, generously butter an 8-inch square pan and set aside.
    • Once cooled to 110°F, beat the mixture with a wooden spoon until the butter is fully integrated and the fudge begins to thicken. Quickly transfer the fudge into the prepared pan before it sets.
    • If including chopped nuts, stir them in rapidly just before pouring the fudge into the pan.
    • Allow the fudge to cool thoroughly before slicing into 1-inch squares. Store in an airtight container in the refrigerator.

    Notes

    To verify proper cooking, drop a bit of the fudge mixture into a bowl of cold water—it should form a pliable ball that flattens easily.
    If the fudge becomes grainy or too firm, it may have been overcooked. To salvage it, add a small amount of milk or water back to the pan, reheat slowly to 236°F, and cool again to 110°F before beating.
  • Cinnamon Sugar French Toast Muffins

    Cinnamon Sugar French Toast Muffins

    Golden, sweet, and packed with cozy spice, French Toast Muffins are a fun twist on a breakfast classic. Each bite delivers warm cinnamon flavor with a soft, custardy center.

    These muffins are simple to make, kid-friendly, and perfect for busy mornings. Their sugary tops add a delicious crunch, making them irresistible to both kids and adults alike.

    The Essentials Behind These French Toast Muffins

    • White Bread – The star of the show, white bread cubes absorb the custard base, creating a soft, melt-in-your-mouth muffin texture.
    • Eggs – Provide the rich, custardy structure that binds everything together, just like in traditional French toast.
    • Milk – Balances the egg mixture and adds creaminess for that classic breakfast comfort.
    • Vanilla Extract – Infuses the muffins with aromatic sweetness and warmth in every bite.
    • Cinnamon – Delivers that signature French toast spice, comforting and just a little bit nostalgic.
    • Granulated Sugar – Brings a touch of sweetness to the batter and an irresistible crunch when sprinkled on top.
    • Maple Syrup – Mixed into the batter and drizzled on top, it adds depth and a sticky-sweet finish.

    How to Make French Toast Muffins: A Quick Glance

    Start by whisking together eggs, milk, vanilla, cinnamon, sugar, and maple syrup into a smooth custard base. Fold in the cubed bread and let it soak briefly to absorb all that flavor.

    Spoon the mixture into a greased or lined muffin pan, filling each well evenly. Sprinkle with a generous pinch of cinnamon sugar before baking. In about 20 minutes, your kitchen will smell like a weekend brunch dream.

    Make It Your Own: Tips and Variations

    For extra decadence, toss in mini chocolate chips or chopped pecans before baking. Want a fruity twist? Add a handful of diced apples or blueberries for bursts of fresh flavor.

    Stale bread works best here—don’t toss those day-old slices! They soak up the custard without turning soggy, giving your muffins the ideal balance of soft and structured.

    Need to prep ahead? Mix the custard and bread the night before, then scoop and bake in the morning for a time-saving breakfast.

    Leftovers? No Problem!

    Store leftover French Toast Muffins in an airtight container in the refrigerator for up to 4 days. To reheat, pop them in the microwave for 20-30 seconds or warm them in the oven at 300°F for about 5-7 minutes.

    These also freeze beautifully—just wrap individually and freeze for up to 2 months. When you’re ready to enjoy, thaw overnight in the fridge and reheat as desired. They’re just as tasty the second time around!

    Cinnamon Sugar French Toast Muffins

    Delightfully simple yet indulgently satisfying, these French Toast Muffins offer the beloved essence of classic French toast served in an individually portioned muffin form. Finished with a sweet cinnamon-sugar topping, this breakfast treat is ideal for all ages.
    Prep Time 15 minutes
    Cook Time 20 minutes
    Total Time 35 minutes

    Ingredients
      

    • 1 tablespoon maple syrup plus extra for drizzling
    • 1 1/2 teaspoons ground cinnamon
    • 12 slices white bread crusts removed and diced into 1/2-inch pieces
    • 3 tablespoons granulated sugar
    • 4 large eggs
    • 1 1/2 cups milk
    • 1 1/2 teaspoons vanilla extract

    Instructions
     

    • Preheat the oven to 350°F and prepare a muffin tin with paper liners or coat it thoroughly with non-stick spray.
    • In a mixing bowl, beat together the eggs, milk, vanilla extract, cinnamon, sugar, and maple syrup until well incorporated.
    • Gently fold the cubed bread into the mixture, ensuring even coverage, and allow it to rest for 1–2 minutes so the bread can soak up the liquid.
    • Combine a portion of the cinnamon and sugar in a separate small bowl for topping.
    • Distribute the bread mixture evenly among the 12 muffin cups, then sprinkle each with the cinnamon-sugar blend.
    • Bake in the preheated oven for 20–25 minutes, or until the muffins are set in the center.
    • Let them cool slightly before serving, and garnish with powdered sugar or a generous drizzle of warm maple syrup, if desired.
  • Bomboloni Italian Donuts Recipe

    Bomboloni Italian Donuts Recipe

    Light, fluffy, and filled with luscious cream, Italian Donuts – Bomboloni are an irresistible treat that brings bakery-level indulgence right to your kitchen. Whether for breakfast, dessert, or a mid-afternoon escape, Bomboloni never disappoint.

    Made from a rich, yeast-leavened dough infused with orange zest and vanilla, these pillowy donuts are fried to golden perfection, dusted in sugar, and filled with velvety pastry cream.

    Star Ingredients for Italian Donuts – Bomboloni

    • Milk (lukewarm 2%) – Provides moisture and warmth to activate the yeast for a soft, tender crumb.
    • Active dry yeast – The backbone of the airy texture, giving the donuts their signature rise and lightness.
    • Granulated sugar – Adds subtle sweetness and helps the dough brown beautifully when fried.
    • Vegetable oil – Keeps the dough moist and is also used for frying to achieve that crisp golden crust.
    • Large egg – Binds the dough together and enriches the flavor with its natural fats.
    • Orange zest – Adds a fragrant, citrusy brightness that lifts the flavor of the dough.
    • Vanilla – Infuses warmth and depth, making the Bomboloni feel luxuriously sweet.
    • All-purpose flour – The foundation of the dough, giving it structure and elasticity.
    • Pastry cream (for filling) – The creamy heart of each donut, customizable with your favorite flavors.

    Let’s Make Bomboloni: A Quick Glimpse at the Process

    Begin by activating the yeast in warm milk, then whisk in sugar, oil, egg, orange zest, and vanilla. Add flour and salt gradually, kneading until the dough is smooth and elastic.

    Let the dough rise until tripled in size—about two to three hours. Roll and cut the dough into rounds, then let them rise again for an hour to become pillowy-soft.

    Fry in gently heated oil until golden brown on each side. Roll the hot donuts in sugar, let them cool slightly, and then fill with your choice of cream—pastry cream, Chantilly, or even hazelnut spread.

    Sweet Tips for Perfect Bomboloni Every Time

    To ensure the dough rises beautifully, place it in a warm, draft-free spot—an oven with the light on works wonders. The dough should feel supple, not sticky; if needed, adjust with a little extra flour.

    Maintain your oil temperature consistently between 340–350°F to avoid undercooked centers or overly dark exteriors. A candy thermometer is helpful here. For fillings, pastry cream is classic, but a coffee-flavored cream or lemon curd can take things up a notch.

    Looking to bake instead of fry? You can! Just pop them into a 350°F oven for 20 minutes, then cool and dust with powdered sugar before filling.

    Keeping Bomboloni Fresh: Storage Tips

    Bomboloni are best enjoyed fresh, right after frying and filling. If you must store them, leave them unfilled in an airtight container at room temperature for up to two days. Once filled, refrigerate and consume within 48 hours for the best texture and taste.

    Freezing is not recommended, as it affects the tender crumb and rich filling, but making the dough ahead and refrigerating overnight before the final rise can be a handy prep trick.

    Bomboloni Donuts Filled with Cream

    A beloved Italian treat, Bomboloni are soft, yeast-leavened doughnuts traditionally enjoyed at breakfast or as a delightful snack. Characterized by their pillowy texture and rich pastry cream filling, these doughnuts are best served fresh, generously coated in sugar.
    Prep Time 15 minutes
    Cook Time 6 minutes
    Rising Time 4 hours
    Total Time 4 hours 21 minutes

    Ingredients
      

    • 1 pinch salt
    • ¾ to 1 tablespoon orange zest
    • tablespoons granulated sugar
    • teaspoons active dry yeast
    • 1 large egg at room temperature
    • 3 tablespoons vegetable oil
    • ½ teaspoon vanilla extract
    • 2 cups + 2 tablespoons all-purpose flour 275 grams
    • ¼ cup + 3 tablespoons lukewarm 2% milk 105 grams
    • For the Filling
    • 1 cup pastry cream flavor of your choice

    Instructions
     

    • In a stand mixer bowl, combine the lukewarm milk and sprinkle the yeast over it. Allow it to sit undisturbed for 5 minutes, then stir gently. Incorporate the sugar, vegetable oil, egg, orange zest, and vanilla, whisking until unified.
    • Gradually add the flour along with the pinch of salt. Using the dough hook attachment, mix the dough at low speed (not exceeding speed 2) until a cohesive dough forms. Continue kneading with the machine for approximately 7 minutes, ensuring a smooth and elastic consistency.
    • Transfer the dough to a clean surface and knead briefly. Shape into a ball and place into a lightly oiled bowl, turning the dough to coat all sides. Cover with plastic wrap and allow it to rise in a warm, draft-free environment until tripled in volume, roughly 2 to 3 hours.
    • Once risen, deflate the dough gently and roll out to a thickness of ¼ to ⅓ inch. Use a 2½ inch (6½ cm) round cutter to shape six donuts. Arrange them on a baking sheet lined with parchment, cover again with plastic wrap, and leave to rise for an additional hour.
    • Heat approximately 2 inches of vegetable oil in a medium saucepan to a steady 340–350°F (170–175°C). Maintain this temperature range while frying. Cook the doughnuts in batches, turning occasionally, for about 2–3 minutes per side until golden.
    • Remove with a slotted spoon and briefly place on a paper towel-lined plate. Immediately roll the hot donuts in granulated sugar, ensuring full coverage.
    • Allow the donuts to cool slightly. Using the handle of a wooden spoon, create a cavity on the side or top of each donut. Enlarge the opening gently and fill with your preferred pastry cream, chantilly, or hazelnut spread. Serve immediately for best results.

    Notes

    For a baked alternative, place shaped dough on a baking tray and bake in a preheated 350°F (180°C) oven for about 20 minutes. Let cool before filling and dust with powdered sugar. Unfilled donuts can be stored in an airtight container at room temperature for up to 2 days. Filled donuts should be refrigerated and consumed within a couple of days. Freezing is not recommended.
  • Almond Banket Bars

    Almond Banket Bars

    Sweet, soft, and brimming with nutty flavor, this almond bars recipe delivers the perfect balance of buttery shortbread and a glossy almond glaze. It’s a simple treat that always disappears fast.

    Whether you’re baking for a crowd or prepping freezer-friendly goodies, almond bars recipe never disappoints. The tender crumb and subtle crunch of sliced almonds keep everyone coming back for seconds.

    Star Players in These Almond Bars

    • Unsalted butter – Adds richness and that classic shortbread texture that melts in your mouth.
    • Granulated sugar – Sweetens the dough while contributing to a tender, crisp bite.
    • All-purpose flour – The structural backbone, giving the bars their shape and stability.
    • Almond extract – The real flavor MVP, infusing both the bars and glaze with a fragrant nuttiness.
    • Eggs – Help bind the dough and give it a chewy softness.
    • Sliced almonds – A toasty crunch on top that makes each bite beautifully textured.
    • Powdered sugar – The base of the silky glaze that crowns the bars with sweet elegance.
    • Milk – Lightens the glaze and helps the almond slices adhere to the dough.

    Let’s Bake: How to Make Almond Bars

    Start by whipping up a soft, buttery dough infused with almond extract. This gets pressed into a large sheet pan, ready to become the base of your bars.

    Brush the top with milk and scatter on sliced almonds, pressing them in just enough to stick. After a quick bake, let them cool briefly before cutting into bars.

    Once fully cooled, a glossy almond glaze gets drizzled across the top. Let it set, and they’re ready to serve or stash away for later.

    Pro Tips & Tasty Twists

    For an even more indulgent take, try toasting the sliced almonds before adding them—this draws out their natural oils and deepens the flavor.

    If you’re feeling creative, swirl in a bit of raspberry jam before baking for a fruity twist. Or substitute vanilla extract for half the almond to soften the nutty intensity if you prefer something milder.

    Always let the bars cool just enough to slice cleanly but not so long that they harden. A plastic knife can work wonders here—less stick, cleaner cuts!

    Storing the Sweetness

    To store leftovers, allow the glaze to fully set, then layer the bars in a freezer-safe bag or container, using wax paper between layers to prevent sticking.

    They freeze beautifully for up to three months and thaw quickly at room temperature—perfect for last-minute coffee dates or dessert cravings.

    If keeping at room temp, store in an airtight container for up to five days to maintain their soft, chewy texture.

    Almond Bars Recipe

    Indulge in these delightful almond bars, boasting a tender, shortbread-inspired base topped with crunchy sliced almonds and a glossy almond glaze. Ideal for making ahead and storing, these bars offer a perfect balance of texture and sweet, nutty flavor.
    Prep Time 15 minutes
    Cook Time 20 minutes
    Total Time 35 minutes

    Ingredients
      

    For the Bars

    • 1 cup unsalted butter softened
    • ½ teaspoon kosher salt
    • 2 large eggs
    • 4 teaspoons baking powder
    • 3 ½ cups all-purpose flour
    • 1 teaspoon almond extract
    • 2 cups granulated sugar

    For the Topping

    • 1 cup sliced almonds
    • 2 tablespoons milk any variety

    For the Glaze

    • 2 tablespoons milk any variety
    • 2 cups powdered sugar
    • ½ teaspoon almond extract

    Instructions
     

    • Preheat your oven to 325°F. Generously grease a half sheet pan (approximately 18″x13″) using butter or baking spray, and set it aside.
    • In a separate medium bowl, mix together the all-purpose flour, baking powder, and kosher salt, then set this dry mixture aside.
    • Using a stand or hand mixer, beat the softened butter with the granulated sugar until the mixture becomes light and fluffy, around 3 to 4 minutes. Incorporate the eggs and almond extract, mixing until fully integrated. Gradually add the flour mixture into the wet ingredients, blending thoroughly until a cohesive dough forms.
    • Evenly press the dough into the prepared baking pan, smoothing the surface with your hands or a pastry roller.
    • Brush the top of the dough with milk using a pastry brush (you may not require the full amount). Sprinkle the sliced almonds over the surface, gently pressing them into the dough to adhere.
    • Bake in the preheated oven for 20 to 22 minutes, ensuring the bars remain pale and do not brown.
    • Allow the bars to cool in the pan for about 5 minutes before slicing them into individual portions. If the texture is too soft for cutting, let them cool slightly longer. Transfer the cut bars to a wire rack to cool completely.
    • Once the bars have cooled, prepare the glaze by whisking together the powdered sugar, almond extract, and milk until smooth. Drizzle the glaze over the bars and let it set before serving.

    Notes

    For freezing, ensure the glaze is fully set before layering the bars in a gallon-sized zip-top bag. Arrange in a single layer or separate layers with wax or parchment paper. To serve, thaw at room temperature. For neater slicing, consider using a plastic knife.
  • Easy Lemon Loaf Cake

    Easy Lemon Loaf Cake

    Bright, buttery, and bursting with citrus, this Easy Lemon Loaf is the sunshine-sweet treat your afternoons have been craving. It’s soft, moist, and deeply infused with fresh lemon flavor.

    Perfect for brunch, dessert, or an anytime snack, this loaf comes together quickly with pantry staples. The tangy glaze soaks into every slice, making each bite melt-in-your-mouth delicious.

    Star Players in This Easy Lemon Loaf

    • Butter – Adds richness and gives the loaf a tender, melt-in-your-mouth crumb.
    • Granulated sugar – Balances the tartness of lemon and helps create a golden crust.
    • Eggs – Provide structure and contribute to the loaf’s airy, cake-like texture.
    • All-purpose flour – Forms the base, giving body and stability to the loaf.
    • Baking powder – Lifts the loaf just right, ensuring it bakes up light and fluffy.
    • Milk – Keeps the loaf moist and helps blend all the ingredients smoothly.
    • Fresh lemon zest – Delivers the bold, fragrant citrus aroma that defines the loaf.
    • Fresh lemon juice – Poured over warm cake, it seeps into every slice for a zingy finish.
    • Extra sugar for glaze – Sweetens the lemon juice topping, adding sparkle and a subtle crunch.

    Let’s Bake! How to Make This Easy Lemon Loaf

    Start by creaming butter and sugar together until light and fluffy. Add eggs one at a time, mixing well.

    In a separate bowl, whisk the flour, baking powder, and salt. Add half of this dry mix to the butter mixture, followed by half the milk. Repeat with the rest.

    Stir in fresh lemon zest, pour the batter into a parchment-lined loaf pan, and bake until golden and a toothpick comes out clean.

    While the loaf bakes, stir lemon juice with sugar for a simple citrus glaze. When the loaf is done, poke it generously and pour the lemon glaze over the top. Let it absorb and cool before slicing.

    Bright Ideas: Tips & Twists for Your Lemon Loaf

    For a little extra flair, fold in a handful of blueberries or poppy seeds before baking. They add a playful texture and pair beautifully with lemon.

    If you want a sweeter glaze, swap granulated sugar for powdered sugar and drizzle it on top instead of soaking. This will create a frosting-like finish rather than a syrup-soaked loaf.

    To elevate the flavor, try adding a splash of vanilla extract or a hint of almond extract for a subtle twist. The lemon will still shine, but with a little something extra in the background.

    Keeping It Fresh: How to Store Your Lemon Loaf

    This lemon loaf actually gets better the next day as the citrus glaze continues to soak in. Wrap it tightly in plastic wrap or store in an airtight container at room temperature for up to three days.

    To freeze, slice the loaf and layer pieces between parchment in a freezer-safe container. Thaw slices individually at room temperature or warm in the microwave for a few seconds.

    Reheat gently to revive the texture, especially if enjoying it warm with a cup of tea or coffee.

    Easy Lemon Loaf

    A delectably moist and tangy lemon loaf, infused with the brightness of freshly squeezed lemon juice and zest. This simple bake delivers bold citrus notes and a tender crumb, making it an irresistible treat perfect for any occasion.
    Prep Time 10 minutes
    Cook Time 45 minutes
    Total Time 55 minutes

    Ingredients
      

    • 1/2 cup unsalted butter
    • 1/2 cup whole milk
    • 1 medium lemon zested
    • 1/4 cup granulated sugar for glaze
    • 1 cup granulated sugar
    • 1/4 tsp fine salt
    • 1 1/2 cups all-purpose flour
    • 1 tsp baking powder
    • 2 large eggs
    • Juice of 1 medium lemon

    Instructions
     

    • Preheat oven to 350°F and line a 1.5L (8×4.5-inch) loaf pan with parchment paper. Set aside.
    • In a mixing bowl, cream together the butter and granulated sugar until light and fluffy.
    • Beat in the eggs individually, ensuring each is well incorporated before adding the next.
    • In a separate bowl, whisk together the flour, baking powder, and salt.
    • Gradually add half of the flour mixture to the butter mixture, stirring to combine.
    • Pour in half of the milk and mix until just blended.
    • Add the remaining flour mixture, then incorporate the rest of the milk along with the lemon zest.
    • Transfer the batter to the prepared loaf pan and smooth the top.
    • Bake in the preheated oven for 45–50 minutes, or until a toothpick inserted into the center emerges clean.
    • While the loaf bakes, mix the lemon juice with 1/4 cup of sugar in a small bowl.
    • Once baked, remove the loaf from the oven and immediately use a knife to pierce holes throughout.
    • Slowly pour the lemon sugar mixture over the warm loaf, allowing it to soak through.
    • Let the loaf cool completely in the pan. The flavor intensifies after resting overnight.

    Notes

    1 medium lemon yields approximately 2 tablespoons of juice and 1 tablespoon of zest.
  • Cherry Cheesecake Fluff

    Cherry Cheesecake Fluff

    Cherry Cheesecake Fluff is the perfect no-bake dessert that brings together the creamy tang of cheesecake and the sweet burst of cherries in every bite. Light, fluffy, and irresistibly easy.

    Whether you’re prepping for a picnic, holiday spread, or a last-minute sweet craving, this crowd-pleaser comes together in minutes. Its dreamy texture and nostalgic flavors never fail to charm.

    The Dream Team: Key Ingredients for Cherry Cheesecake Fluff

    • Cream cheese – The rich and creamy foundation that gives the fluff its indulgent cheesecake essence.
    • Cheesecake pudding mix – Intensifies the cheesecake flavor while adding velvety smoothness.
    • Vanilla extract – Enhances all the other flavors with its sweet, aromatic warmth.
    • Whole milk – Loosens up the base mixture just enough to keep it luxuriously smooth.
    • Frozen whipped topping – Adds that essential airy lift that turns the mixture into a soft, cloud-like dessert.
    • Cherry pie filling – The sweet-tart cherry ribbons swirl through the fluff, adding vibrant flavor and a pop of color.
    • Mini marshmallows – Bring playful texture and sweetness, perfectly balancing the tangy cheesecake notes.

    Whipping It Up: How to Make Cherry Cheesecake Fluff

    Start by blending the cream cheese, pudding mix, vanilla, and milk until creamy and smooth. This creates the lush, cheesecake-like base that anchors the dessert.

    Next, gently fold in the whipped topping to keep the mixture light and airy—this is where the magic of fluff begins. Avoid overmixing to preserve that dreamy texture.

    Now comes the fun part: stir in the cherry pie filling and mini marshmallows. The cherries create gorgeous swirls of color and flavor, while the marshmallows provide that soft chew in every spoonful.

    Once combined, let it chill in the fridge for at least an hour. This rest time allows the ingredients to fully set and the flavors to meld, making each bite even better.

    Pro Tips & Tasty Variations for Your Fluff Game

    For the best results, make sure your cream cheese is fully softened before mixing—it’ll blend smoother and prevent lumps. Want a richer version? Swap whole milk for half-and-half.

    Looking to switch things up? Try blueberry or strawberry pie filling instead of cherry for a fruity twist. You can even mix in chopped nuts or crushed graham crackers for a little crunch.

    For a lighter version, use low-fat whipped topping and reduced-fat cream cheese without compromising too much on flavor. It’s a versatile dessert that’s easy to adapt to your taste or dietary needs.

    Chill Mode: Storing Cherry Cheesecake Fluff

    To keep your Cherry Cheesecake Fluff fresh and fabulous, store it in an airtight container in the refrigerator for up to 3 days. Be sure to give it a quick stir before serving to revive its fluffiness.

    While freezing isn’t recommended due to the texture change, you can make it a day ahead to save time. Just don’t add the marshmallows until right before serving—they’ll stay perfectly soft that way.

    Cherry Cheesecake Fluff

    Savor the sumptuous delight of Cherry Cheesecake Fluff—a no-bake dessert that combines rich cream cheese, velvety cheesecake pudding, and vibrant cherry pie filling. Perfect for any occasion, this luscious treat offers a harmonious blend of textures and flavors in every spoonful.
    Prep Time 15 minutes
    Refrigeration Time 1 hour
    Total Time 1 hour 15 minutes

    Ingredients
      

    • One 10-ounce bag of mini marshmallows
    • One 8-ounce container of frozen whipped topping
    • One 3.4-ounce box of cheesecake-flavored instant pudding mix
    • One teaspoon of vanilla extract
    • One 8-ounce block of cream cheese softened
    • 1/4 cup of whole milk
    • One 21-ounce can of cherry pie filling

    Instructions
     

    • In a large mixing vessel, blend the softened cream cheese, cheesecake-flavored instant pudding mix, vanilla extract, and whole milk. Beat the mixture using either a hand whisk or electric mixer until it reaches a smooth, cohesive consistency.
    • Introduce the frozen whipped topping to the cream mixture. Gently fold it in using a spatula, taking care to preserve the mixture’s airy and fluffy character.
    • Gradually incorporate the mini marshmallows followed by the cherry pie filling into the prepared base. Use gentle folding motions to ensure uniform distribution without deflating the mixture.
    • Transfer the combined fluff into a serving bowl or dish. Chill in the refrigerator for a minimum of one hour to enhance the dessert’s texture and allow the flavors to harmonize. Serve chilled.