Category: RECIPES

  • Southern Cheese Crackers

    Southern Cheese Crackers

    Crispy Cheesy Southern Cheese Crackers are the perfect bite-sized snack for any gathering, brimming with bold cheddar flavor and a signature Southern crunch. They’re nostalgic, irresistible, and totally addictive.

    Whether served at a holiday party or wrapped up as an edible gift, these savory gems never fail to impress. Their melt-in-your-mouth texture and cheesy bite make them an unforgettable treat.

    What You’ll Need to Make These Crispy Cheesy Southern Cheese Crackers

    • Extra sharp cheddar cheese – The heart of the recipe, delivering intense flavor and that unmistakable cheesy punch in every bite.
    • Unsalted butter – Adds richness and flakiness, balancing the cheese and binding the dough.
    • All-purpose flour – The structure behind the cracker; it holds everything together with a crisp finish.
    • Kosher salt – Enhances the cheese’s flavor while deepening the savory notes throughout.
    • Cayenne pepper – Just a touch brings a warm, peppery heat that lingers playfully on the palate.
    • Hot sauce – Adds a tangy depth and subtle zing without overpowering the cheddar.
    • Heavy cream – Moistens the dough, making it pliable enough to shape while keeping it tender after baking.

    Let’s Make Magic: Steps to Crispy Cheesy Southern Cheese Crackers

    Start by blending flour, kosher salt, and cayenne in a food processor for a perfectly spiced base. Pulse in cold butter and hot sauce until the mix resembles coarse sand.

    Add shredded cheese and pulse again. Slowly drizzle in the heavy cream until the dough just starts to come together, then form it into logs and chill thoroughly.

    Once chilled, slice the dough into thin rounds. Arrange them on a parchment-lined sheet and bake until they’re golden and crisp.

    Cool on a wire rack, and get ready to watch them disappear faster than you can say “pass the crackers.”

    Tips, Tricks & Tasty Twists for Cheesy Southern Crackers

    For extra color and crunch, sprinkle the tops with flaky salt or smoked paprika before baking. Want a rustic, handmade look? Lightly press each slice with a fork before baking. If you love a little heat, feel free to double the cayenne or add a pinch of smoked chipotle powder.

    For variation, try mixing in finely chopped pecans, a dash of Worcestershire, or even some minced fresh rosemary. These crackers are forgiving and flexible—make them your own.

    Keep ‘Em Fresh: How to Store Southern Cheese Crackers

    After baking, store the crackers in an airtight container at room temperature for up to a week. To maintain their crispness, pop them into a low oven (200°F) for a few minutes before serving.

    The dough logs freeze beautifully—wrap tightly and freeze for up to three months. When ready to bake, slice directly from the freezer and extend baking time slightly until golden and crispy.

    Crispy Cheesy Southern Cheese Crackers

    A beloved Southern classic, these crackers are rich with sharp cheddar flavor, perfectly crisp, and satisfyingly savory—ideal as a refined snack or appetizer.
    Prep Time 25 minutes
    Cook Time 15 minutes
    Chill time 3 hours
    Total Time 3 hours 40 minutes

    Ingredients
      

    • 2 –3 dashes hot sauce
    • 1 stick unsalted butter cold and cubed
    • ½ teaspoon cayenne pepper
    • 1 lb extra sharp cheddar cheese grated
    • 6 –8 tablespoons heavy cream
    • 1 teaspoon kosher salt
    • 2 cups all-purpose flour or substitute King Arthur’s Measure for Measure Gluten-Free Flour

    Instructions
     

    • Place flour, kosher salt, and cayenne pepper into a food processor and pulse several times to combine thoroughly. Incorporate the cubed butter along with the hot sauce, processing the mixture for approximately 10 seconds until it achieves a coarse, mealy texture.
    • Introduce the shredded cheddar cheese to the mixture and pulse again until uniformly blended. If your food processor has a smaller capacity, you may need to divide the mixture and work in batches.
    • Gradually add heavy cream, one tablespoon at a time, pulsing until the dough begins to pull away from the sides of the bowl. Expect to use 6–8 tablespoons for a full batch or 3–4 tablespoons per half batch if divided.
    • Transfer the dough to a clean surface and gently press it into a cohesive ball—it may still appear slightly crumbly. Divide into two portions, shaping each into a cylindrical log. For easier handling, wrap each log in wax or parchment paper during shaping. This process yields four logs in total, each measuring about 12 to 14 inches in length. Wrap logs tightly in plastic wrap and refrigerate for several hours to firm.
    • When ready to bake, set the oven to 350°F. Line baking sheets with parchment paper. Slice logs thinly and evenly, spacing slices slightly apart on the prepared sheet as they will expand during baking.
    • Optionally, sprinkle the tops with a touch of salt or paprika for added flavor and color, or gently prick each slice with a fork for decorative appeal.
    • Bake for 10 to 12 minutes, or until the crackers are golden and crisp.
    Notes

    For any thicker slices that remain soft after baking, return them to the oven at 200°F for an additional 30 minutes or until crisp. Dough logs can be frozen for future use, allowing for convenient, on-demand baking.
  • Swedish Meatball Noodle Bake

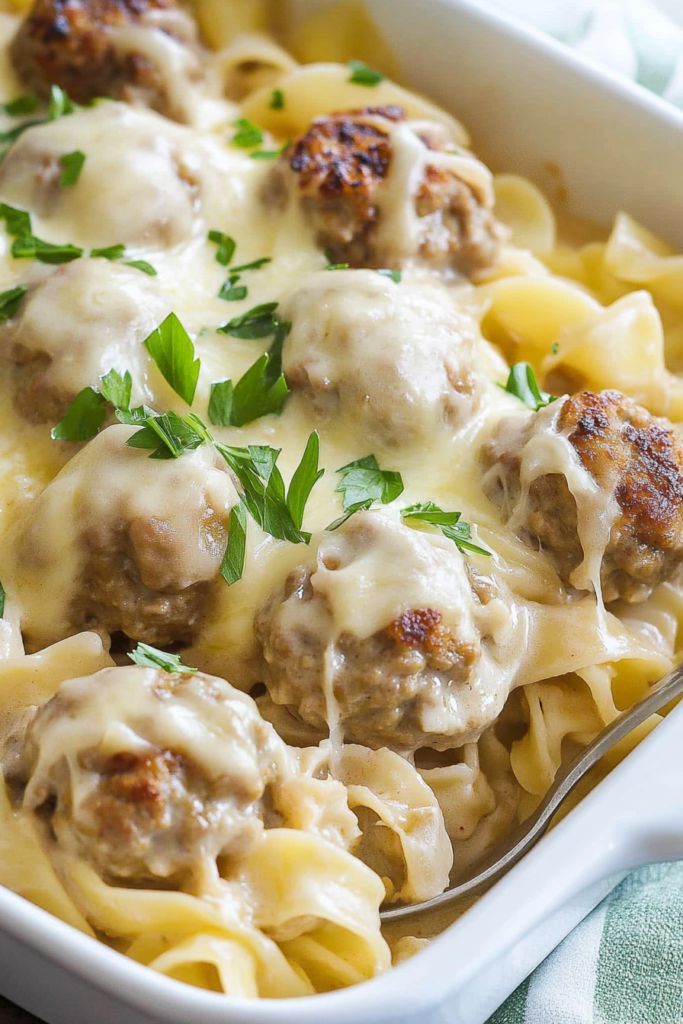
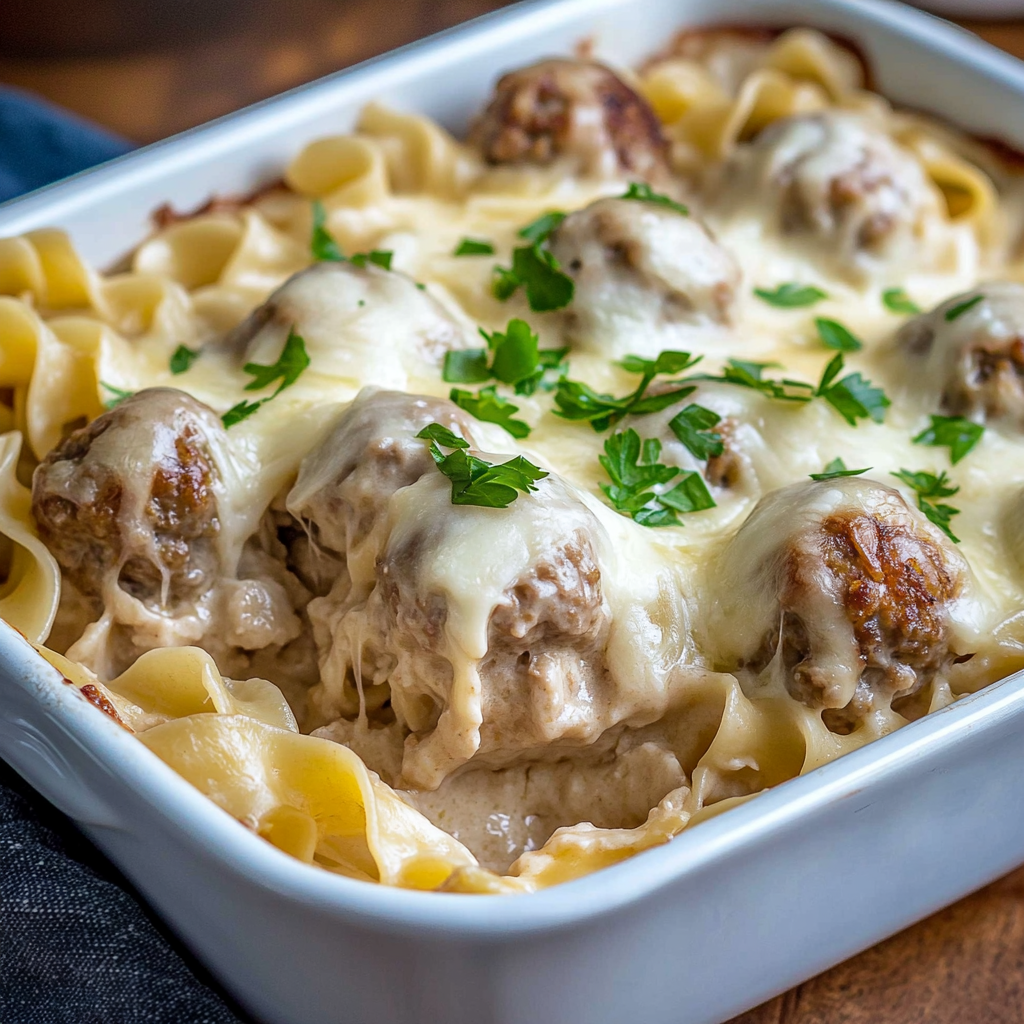
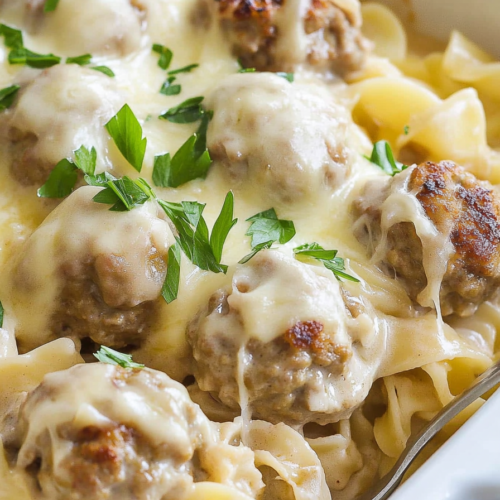
    Swedish Meatball Noodle Bake

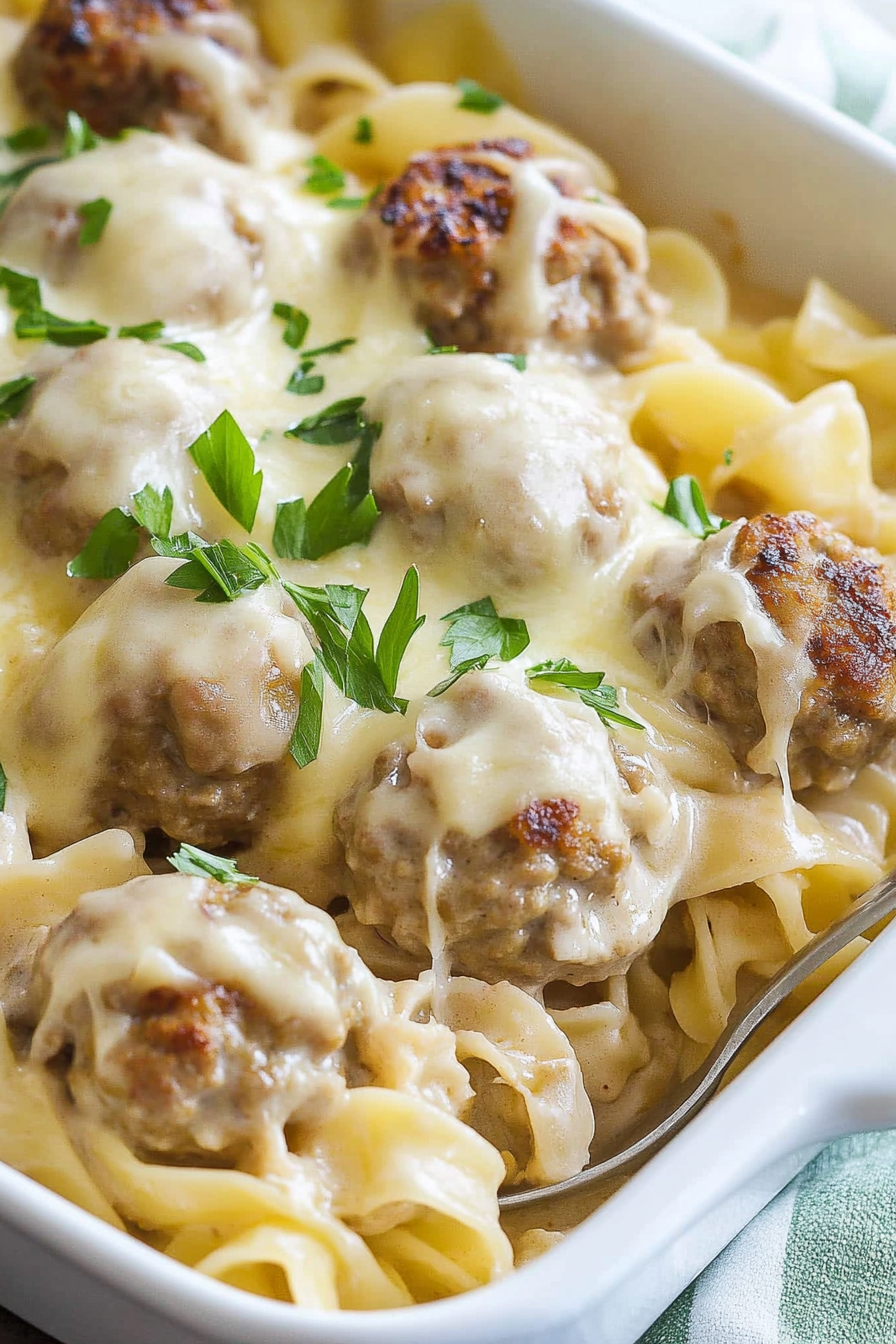
    Classic comfort food gets a creamy, Nordic twist in this rich and savory Swedish Meatball Noodle Bake that’s perfect for cozy weeknight dinners or casual entertaining.

    With tender meatballs, cheesy egg noodles, and a luscious cream sauce, Swedish Meatball Noodle Bake brings a satisfying bite of Sweden right to your table.

    What You’ll Need for This Cozy Swedish Meatball Noodle Bake

    • Ground beef – Forms the savory base of the meatballs, delivering richness and a tender bite.
    • Breadcrumbs – Helps bind the meatballs while keeping them juicy and light.
    • Egg – Provides structure, holding the meatballs together during cooking.
    • Grated onion – Adds sweetness and moisture without chunks, melding seamlessly into the meatballs.
    • Nutmeg – A classic Swedish touch that adds subtle warmth and depth.
    • Garlic powder – Boosts the overall savoriness with a mellow, aromatic kick.
    • Beef broth – Lays down a deep, meaty base for the cream sauce.
    • Heavy cream – Creates that signature silky texture in the Swedish-style sauce.
    • Worcestershire sauce – Adds umami complexity that ties the sauce together.
    • Egg noodles – The perfect pasta to cradle the meatballs and soak up every bit of sauce.
    • Swiss cheese – Melts into a gooey, nutty topping that seals in all the flavors.

    From Skillet to Oven: How to Make Swedish Meatball Noodle Bake

    Start by mixing and shaping the meatballs, then brown them until golden. Cook your noodles just shy of al dente, giving them room to finish in the oven.

    In the same skillet, build your sauce with beef broth, cream, and Worcestershire, letting it simmer to thicken slightly. Nestle the meatballs and noodles into a baking dish, pour over the sauce, and blanket it all with cheese.

    Bake until bubbly and golden on top. Let it rest briefly before diving in to allow everything to set up perfectly.

    Cozy Tips & Simple Variations for a Better Bake

    For extra flavor in your meatballs, try swapping ground beef for a mix of beef and pork. You can also use fresh garlic and a dash of allspice to lean even further into the Swedish flavor profile.

    If you’re short on time, frozen meatballs (browned beforehand) work in a pinch, although homemade always delivers a more tender bite.

    Want more veggie content? Add sautéed mushrooms or a handful of baby spinach to the sauce before assembling the bake for a twist that doesn’t compromise comfort.

    Leftovers? Here’s How to Keep the Goodness Going

    Store any leftovers in an airtight container in the refrigerator for up to 4 days. Reheat gently in the oven or microwave with a splash of broth or cream to revive the sauce’s richness.

    To freeze, let the dish cool completely, then wrap it tightly. Thaw in the fridge overnight and bake at 350°F until warmed through, adding a little extra cheese on top if desired.

    Swedish Meatball Noodle Bake

    A hearty and comforting casserole that blends tender meatballs, creamy sauce, and perfectly baked noodles, this dish captures the essence of Swedish flavors in a crowd-pleasing format.
    Prep Time 15 minutes
    Cook Time 20 minutes
    Total Time 35 minutes

    Ingredients
      

    For the Meatballs:

    • 1 lb ground beef
    • 1 teaspoon Kosher salt
    • 1/4 teaspoon ground nutmeg
    • 1/2 teaspoon garlic powder
    • 2 tablespoons olive oil
    • 1 large egg beaten
    • 1/2 teaspoon freshly ground black pepper
    • 1/2 cup breadcrumbs
    • 1/2 onion grated

    For the Casserole:

    • 1 tablespoon Worcestershire sauce
    • 1 1/2 cups Swiss cheese grated
    • Fresh parsley chopped, for garnish
    • Kosher salt and freshly ground black pepper to taste
    • 1 pint heavy cream
    • 2 1/2 cups egg noodles
    • 1 cup beef broth

    Instructions
     

    • Preheat the oven to 375°F and lightly coat a 9×13-inch baking dish with nonstick spray; set aside.
    • In a large mixing bowl, combine ground beef, breadcrumbs, beaten egg, grated onion, ground nutmeg, garlic powder, salt, and black pepper. Shape the mixture into 1 1/2-tablespoon-sized balls.
    • Warm olive oil in a large skillet over medium-high heat. Sear the meatballs until browned on all sides; they do not need to be cooked through. Remove the browned meatballs and set aside.
    • Bring a large pot of salted water to a boil. Cook the egg noodles for approximately 2 minutes less than the package instructions, then drain.
    • Using the same skillet where the meatballs were browned, pour in the beef broth, heavy cream, and Worcestershire sauce. Scrape the bottom to incorporate any browned bits. Simmer the sauce for about 10 minutes until it thickens slightly. Season with salt and pepper.
    • Place the cooked noodles into the prepared baking dish and arrange the meatballs throughout. Evenly pour the cream sauce over the entire dish and sprinkle with grated Swiss cheese.
    • Bake for 20 minutes or until the cheese is bubbling and fully melted. Let the casserole rest for 5 minutes before garnishing with chopped parsley and serving.

    Notes

    For added richness, consider substituting part of the heavy cream with sour cream.
  • Impossible Coconut Pie

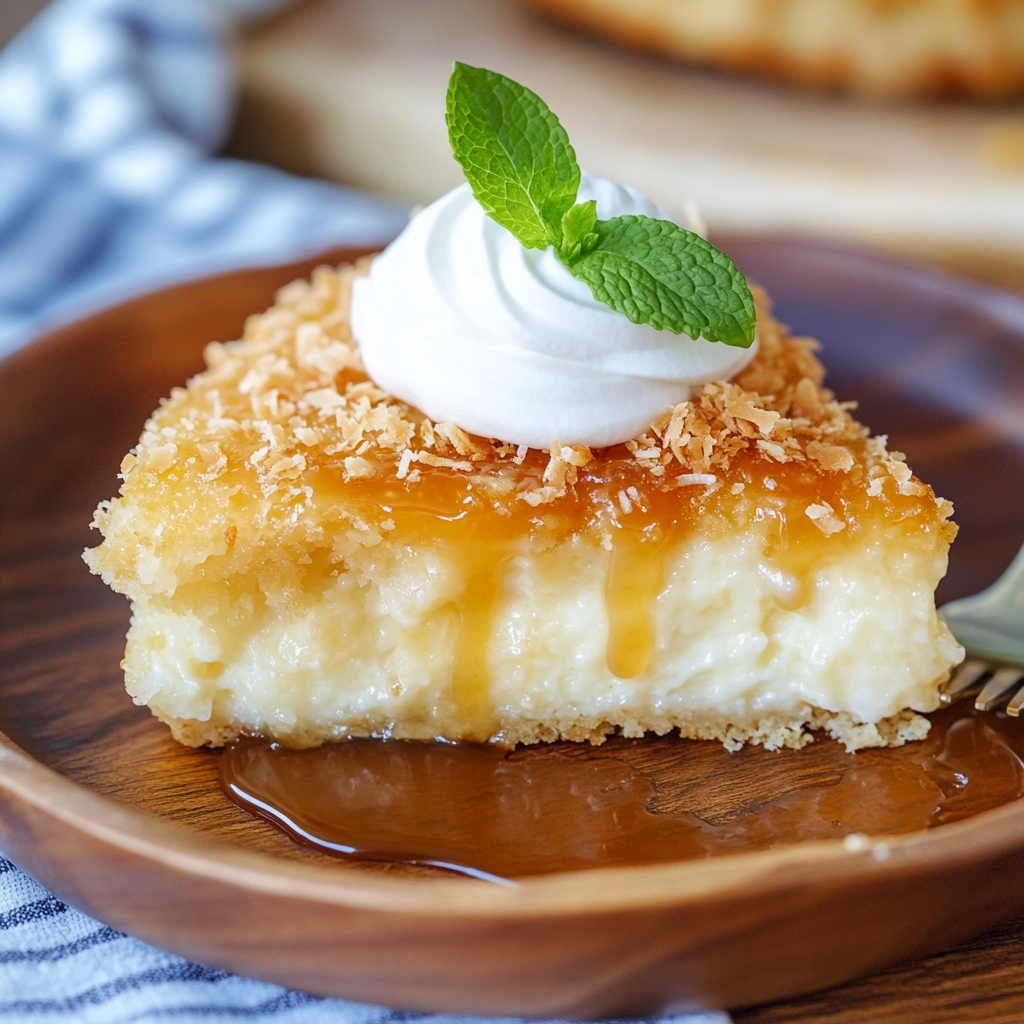
    Impossible Coconut Pie

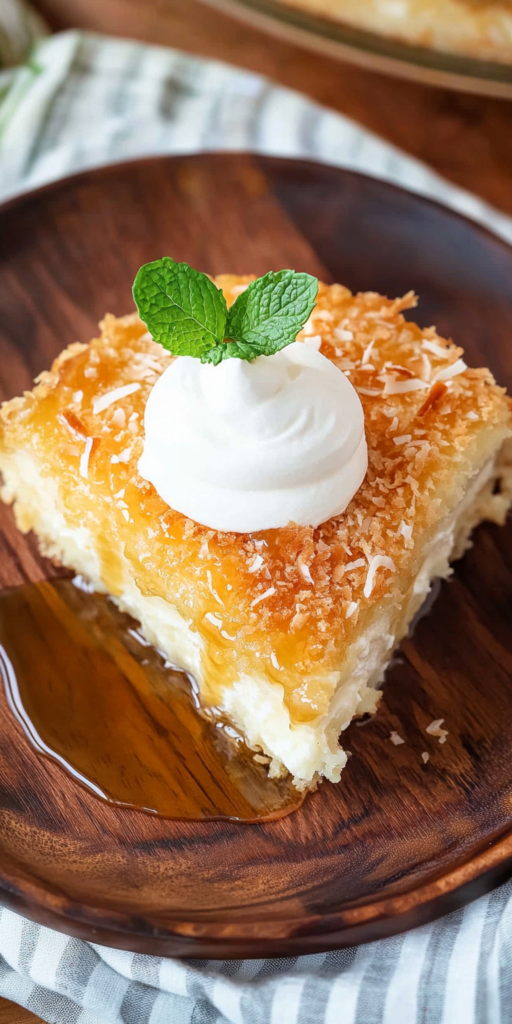
    Impossible coconut pie is a quick, comforting dessert that forms its own crust as it bakes—no rolling or fussing required. This recipe is pure magic in just 10 minutes of prep.

    A creamy custard base, a golden coconut topping, and a hint of vanilla make this impossible coconut pie irresistible. It’s a nostalgic favorite that’s both homey and elegant.

    The Star Players in This Impossible Coconut Pie

    • Flaked or shredded coconut – Adds rich texture and the signature sweet, toasty flavor.
    • Sugar – Sweetens the custard and balances the natural richness of the coconut.
    • Bisquick – The secret ingredient that forms a light, self-making crust as it bakes.
    • Butter (melted) – Brings richness and helps create the pie’s tender, golden edges.
    • Milk – Forms the silky base of the custard and keeps everything moist and luscious.
    • Vanilla extract – Deepens the flavor and enhances the pie’s warmth and aroma.
    • Eggs (room temperature, lightly beaten) – Bind everything together for a smooth, creamy texture.

    How to Make This Magic Happen

    Preheat your oven to 350°F and grease a 9-inch pie dish—this beauty doesn’t need a crust.

    Whisk all the ingredients together in one bowl until fully combined. No layering, no mixing tricks—just pour and go.

    Set the pie plate on a baking sheet to catch any spills. Pour in the filling and slide it into the oven.

    Bake for about 45 to 50 minutes until the center sets, a toothpick comes out clean, and the top turns golden and gently toasted.

    Tips, Twists & Coconut Love

    Let the pie cool slightly before slicing so the custard has time to set fully. If you’re a fan of toasted coconut, sprinkle a little extra on top during the last 10 minutes of baking for added crunch.

    For flavor variations, try a splash of coconut extract or a handful of mini chocolate chips stirred into the batter. You can also swap whole milk for canned coconut milk if you’re craving even more tropical flavor.

    If you want a citrus note, add a teaspoon of lemon or lime zest to brighten up the custard.

    Leftovers? No Problem!

    Store leftover impossible coconut pie tightly covered in the refrigerator for up to 4 days. It tastes just as good chilled as it does warm, making it a great make-ahead dessert.

    To reheat, pop a slice in the microwave for 15 to 20 seconds to bring back that cozy, fresh-from-the-oven feel. Freezing isn’t recommended, as the custard texture may become watery once thawed.

    Impossible Coconut Pie

    This effortless coconut pie delivers a luscious custard texture brimming with coconut, all without the need for a traditional crust. Ready in under an hour, it’s an ideal choice for a quick yet indulgent dessert.
    Prep Time 10 minutes
    Cook Time 45 minutes
    Total Time 55 minutes

    Ingredients
      

    • 1/2 cup Bisquick
    • 1 3/4 cups milk
    • 1 1/2 teaspoons vanilla extract
    • 1/4 cup butter melted
    • 3/4 cup granulated sugar
    • 1 cup shredded or flaked coconut
    • 4 large eggs room temperature, lightly beaten

    Instructions
     

    • Adjust oven rack to the center and preheat the oven to 350°F (177°C). Lightly coat a 9-inch pie plate with nonstick spray and set aside.
    • In a mixing bowl, thoroughly blend the eggs, milk, vanilla, Bisquick, sugar, butter, and coconut until the mixture is fully unified.
    • Position the greased pie plate on a rimmed baking sheet for stability. Carefully pour the combined batter into the pie plate.
    • Transfer to the preheated oven and bake for 45 to 50 minutes. The pie is done when the top turns golden and a toothpick inserted into the center emerges clean.

    Notes

    Allow the pie to cool slightly before serving. It may be enjoyed warm or chilled depending on preference.
  • Slow Cooker Cheesy Hamburger Macaroni

    Slow Cooker Cheesy Hamburger Macaroni

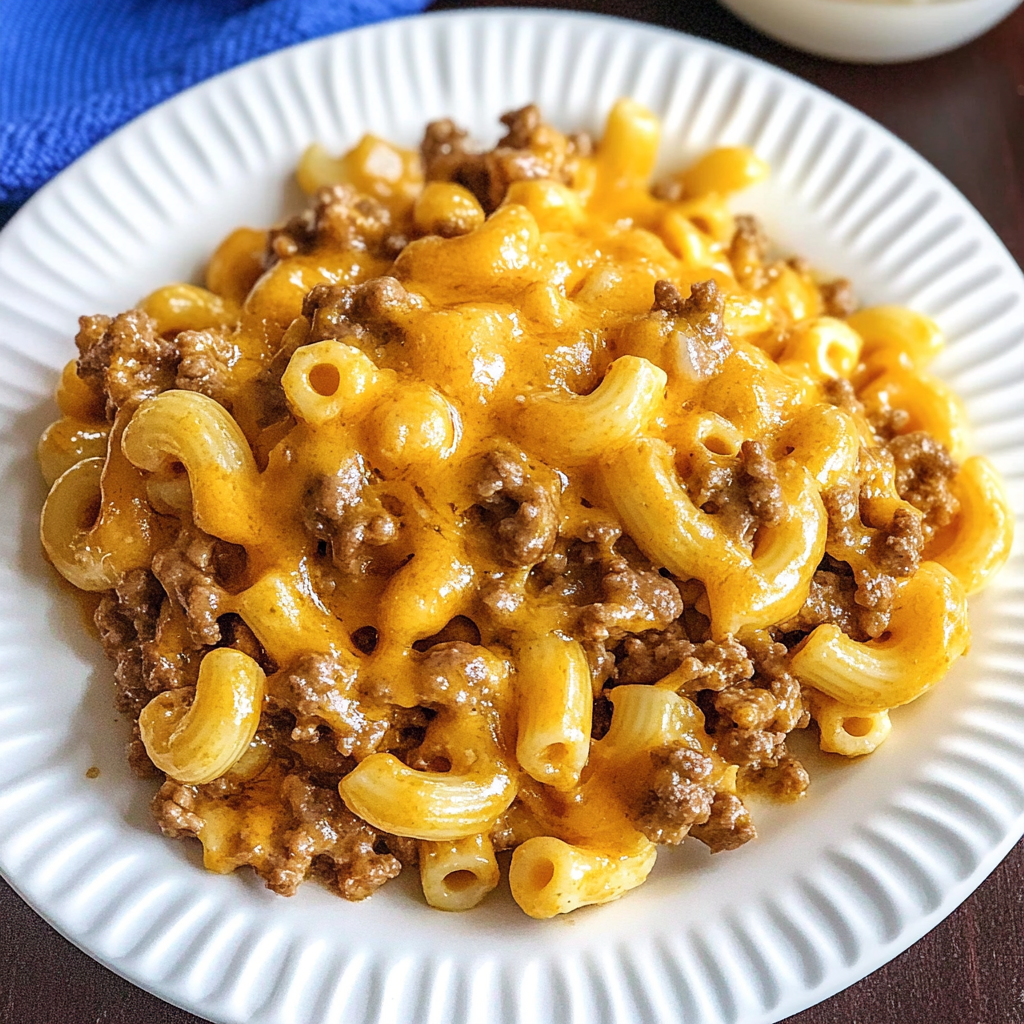
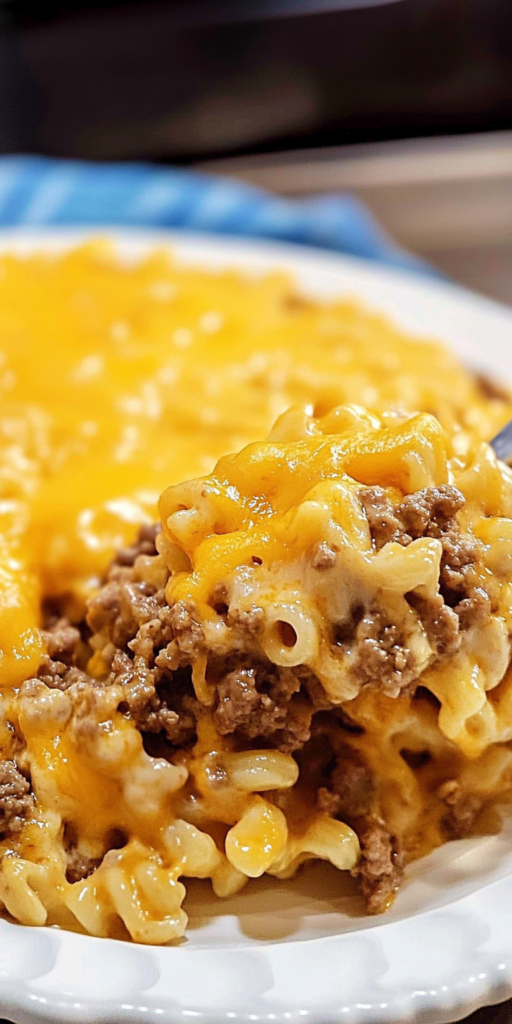
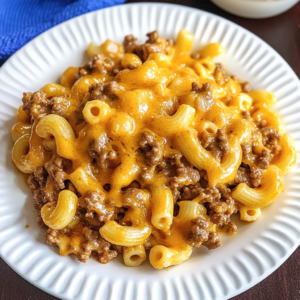
    Crock Pot Cheeseburger Macaroni is the ultimate comfort food mash-up—think creamy mac and cheese meets a juicy cheeseburger, all made effortlessly in your slow cooker.

    This easy one-pot meal is rich, hearty, and packed with cheesy, beefy goodness that satisfies both kids and grown-ups alike.

    What You’ll Need for This Crock Pot Cheeseburger Macaroni

    • Ground beef – Brings the savory, meaty base that defines the cheeseburger flavor in every bite.
    • Onion – Adds depth and mild sweetness that balances the richness of the cheese and beef.
    • Beef stock – Infuses the entire dish with bold, savory flavor while keeping the macaroni tender and juicy.
    • Cream of potato soup – Offers creamy texture and subtle flavor that complements the beef and cheese perfectly.
    • Elbow macaroni – The pasta of choice, soaking up all the saucy, cheesy goodness without getting mushy.
    • Velveeta cheese – Melts seamlessly into the dish for that signature creamy, velvety finish.
    • Cheddar cheese – Adds sharpness and a golden topping that ties the cheeseburger theme together.

    How to Make It Happen: Crock Pot Cheeseburger Macaroni, Step-by-Step

    Start by browning the ground beef until fully cooked, then transfer it to your slow cooker. Add in finely diced onion, beef stock, cream of potato soup, and seasonings, stirring well to combine.

    Cover and cook on low for about 4–6 hours or on high for 2–4 hours, stirring occasionally if you can. When you’re about 30 minutes from mealtime, stir in the dry elbow macaroni and let it cook through, stirring every 10 minutes to avoid sticking.

    Once the noodles are tender, mix in cubed Velveeta until melted and luscious. Finish it all off with shredded cheddar sprinkled over the top—let it melt into gooey perfection, then serve hot and enjoy every cheesy spoonful.

    Cheeseburger-Inspired Tips & Twists

    For extra depth, consider adding a splash of Worcestershire sauce or a squirt of ketchup and mustard when adding the soup—it really dials up the cheeseburger flavor. If you’re craving some crunch, top each serving with crushed pickles or crispy bacon bits. For a spicier take, stir in diced green chilies or a pinch of cayenne. Ground turkey or chicken works just as well if you’re looking for a leaner twist.

    And don’t skip the cream of potato soup—it acts as a creamy binding agent and enhances the dish’s heartiness. You can also substitute it with cream of mushroom or cheddar soup for a slight flavor shift.

    Storing the Goodness: Leftover Love

    This Crock Pot Cheeseburger Macaroni stores beautifully. Let it cool completely before transferring to an airtight container. In the fridge, it’ll last up to 4 days. To freeze, portion it into freezer-safe containers for up to 2 months.

    To reheat, microwave individual servings with a splash of milk or beef broth to loosen it up. For a full reheat, warm it gently on the stovetop over medium-low heat, stirring frequently to prevent sticking and maintain creaminess.

    Crock Pot Cheeseburger Macaroni

    A hearty, slow-cooked twist on the classic hamburger helper, this Crock Pot Cheeseburger Macaroni is packed with savory beef, creamy cheeses, and tender pasta—all infused with bold seasoning and rich broth. Effortless to prepare and deeply satisfying, this dish is perfect for cozy weeknight dinners.
    Prep Time 10 minutes
    Cook Time 5 hours 45 minutes
    Total Time 5 hours 55 minutes

    Ingredients
      

    • 10.5 ounces cream of potato soup
    • 1 teaspoon onion powder
    • 1 small onion finely diced
    • 1 teaspoon black pepper
    • 2 cups shredded cheddar cheese
    • 16 ounces elbow macaroni uncooked
    • 1 teaspoon garlic powder
    • 2 pounds ground beef
    • 8 ounces Velveeta cheese cubed
    • 4 cups beef stock
    • 1 teaspoon paprika

    Instructions
     

    • In a large skillet over medium-high heat, brown the ground beef, crumbling it as it cooks until no pink remains, approximately 10 minutes. Drain the excess fat and transfer the beef to the bottom of a 6 to 8-quart slow cooker.
    • To the slow cooker, add the diced onion, beef stock, cream of potato soup, black pepper, garlic powder, onion powder, and paprika. Stir thoroughly to integrate all the ingredients.
    • Secure the lid and cook on low for 4 to 6 hours or on high for 2 to 4 hours, stirring intermittently if possible.
    • Stir in the uncooked elbow macaroni and continue cooking for 20 to 30 minutes, stirring every 10 minutes, until the pasta reaches a tender texture.
    • Incorporate the cubed Velveeta cheese, stirring it through the mixture. Cover and allow to sit for 5 minutes, then stir until fully melted and evenly combined.
    • Sprinkle the shredded cheddar cheese across the top, replace the lid, and let it melt completely, approximately 5 to 10 minutes.
    • Serve warm and enjoy the creamy, cheesy comfort.

    Notes

    Refer to the FAQ section for suggested ingredient swaps and common troubleshooting tips.
  • Bisquick Sausage Muffins

    Bisquick Sausage Muffins

    Bisquick sausage muffins are a hearty and savory treat perfect for a quick breakfast, a midday snack, or a flavorful companion to soups. Bisquick sausage muffins can even be made in appetizer size for a crowd-pleasing bite!

    Each muffin bursts with savory sausage, sharp cheddar, and a hint of fresh green onion, creating a delightful flavor in every bite. Whether fresh from the oven or packed for later, they promise cozy comfort with minimal effort.

    Ingredients That Make Bisquick Sausage Muffins Irresistible

    • Breakfast sausage (16 ounces) – Delivers the hearty, savory flavor that forms the backbone of these muffins.
    • Large eggs (4, lightly beaten) – Add richness and help bind everything together beautifully.
    • Sharp cheddar cheese (1 cup, shredded) – Melts into gooey pockets of bold, tangy goodness.
    • Green onions (1/4 cup, sliced) – Bring a fresh, mild bite that balances the richness.
    • Bisquick™ Original Pancake & Baking Mix (1 cup) – The essential shortcut that gives the muffins structure and a tender crumb.

    How to Whip Up These Delicious Bisquick Sausage Muffins

    Preheat your oven to 350°F and get your muffin pan ready with liners or a light greasing. Cook and crumble the sausage in a skillet until perfectly browned, then let it cool slightly. In a bowl, mix the eggs, cheese, green onions, cooked sausage, and Bisquick until well combined. Spoon the mixture into the muffin tins about three-quarters full. Bake until the tops are golden brown and baked through, around 20 minutes.

    Tasty Tips and Clever Variations for Bisquick Sausage Muffins

    For the best flavor, use a high-quality breakfast sausage with a little spice or seasoning already mixed in. You can easily switch up the cheese for something like pepper jack or mozzarella to change the flavor profile. Adding finely diced bell peppers or a sprinkle of Italian seasoning to the batter can give the muffins a fun twist. If making these as appetizers, use a mini muffin pan and bake for a slightly shorter time to keep them tender and moist.

    Keeping Bisquick Sausage Muffins Fresh and Fabulous

    Store leftover muffins in an airtight container in the refrigerator for up to four days. For longer storage, freeze them individually wrapped in plastic and placed in a freezer bag for up to two months. To reheat, simply microwave a muffin for about 30 seconds if refrigerated, or a little longer if frozen, until warmed through.

    Bisquick Sausage Muffins

    Hearty, savory, and packed with flavor, Bisquick sausage muffins are the ideal choice for breakfast, a quick snack, or a delightful side to a warm bowl of soup. They can also be crafted into smaller sizes for charming appetizers.
    Prep Time 5 minutes
    Cook Time 30 minutes
    Total Time 35 minutes

    Ingredients
      

    • 1/4 cup green onions sliced
    • 16 ounces breakfast sausage
    • 1 cup Bisquick™ Original Pancake & Baking Mix
    • 4 large eggs lightly beaten
    • 1 cup sharp cheddar cheese shredded

    Instructions
     

    • Preheat the oven to 350°F (177°C) and either line a 12-cup muffin pan with cupcake liners or generously grease the muffin cups; set aside. In a large 12-inch skillet set over medium-high heat, cook the sausage, breaking it apart with a spoon, until fully browned and no pink remains. Transfer the cooked sausage to a paper towel-lined plate and allow it to cool for approximately 10 minutes. In a medium-sized mixing bowl, combine the lightly beaten eggs, shredded sharp cheddar cheese, sliced green onions, the cooled sausage, and the Bisquick baking mix, stirring until the mixture is evenly incorporated. Spoon the batter into the prepared muffin cups, filling each about three-quarters full. Bake in the preheated oven for around 20 minutes, or until the muffins turn golden brown on top and a toothpick inserted into the center comes out clean.

    Notes

    For bite-sized appetizers, use a mini muffin tin and adjust the baking time accordingly, reducing it by a few minutes.
  • Crispy Fried Mushrooms

    Crispy Fried Mushrooms

    Crispy Fried Mushrooms Recipe delivers golden, crunchy perfection with seasoned panko breadcrumbs coating tender white button mushrooms. This irresistible appetizer brings mouthwatering texture and a burst of savory flavor.

    A favorite for gatherings and game days, these crispy fried mushrooms are easy to make and even easier to devour. Serve them with your favorite dipping sauce for a crowd-pleasing treat.

    What You’ll Need to Make Crispy Fried Mushrooms Recipe

    • White Button Mushrooms – The star of the show, offering a mild, earthy flavor that crisps beautifully when fried.
    • Panko Breadcrumbs – Essential for achieving that ultra-crispy, golden coating that sets these mushrooms apart.
    • Buttermilk – Adds subtle tanginess and helps the breadcrumbs cling for a thick, satisfying crust.
    • All-Purpose Flour – Forms a base layer that ensures the buttermilk and panko adhere properly.
    • Old Bay Seasoning – Brings a classic, savory spice blend that elevates the flavor profile.
    • Marjoram – A hint of floral, herbal depth that complements the earthiness of the mushrooms.
    • Garlic Powder – Infuses each bite with aromatic, rich garlic flavor without overpowering.
    • Kosher Salt – Enhances all the other flavors while keeping the dish perfectly seasoned.
    • Fresh Ground Black Pepper – Adds a subtle kick and peppery warmth.
    • Vegetable Oil – Ideal for frying due to its neutral flavor and high smoke point.

    How to Make These Crispy Fried Mushrooms Recipe

    Start by mixing panko breadcrumbs with Old Bay seasoning, marjoram, garlic powder, salt, and pepper. Prepare a bowl of buttermilk on the side.

    Wash and thoroughly dry your mushrooms, then coat them lightly in flour using a zipper bag for easy tossing. Dip each mushroom into the buttermilk, then roll them in the seasoned panko mixture until completely covered.

    Heat about 1 1/4 inches of vegetable oil to 375°F in a deep pot or Dutch oven. Fry the mushrooms in small batches, turning occasionally, until golden brown—about 2–3 minutes. Remove and drain on paper towels.

    Tips and Tricks for Crispy Fried Mushrooms Recipe

    For the cleanest mushrooms, a quick rinse under cold water followed by thorough drying works wonders, despite traditional advice favoring a damp cloth. This ensures they are grime-free without absorbing too much water.

    To avoid messy breading fingers, designate one hand for wet ingredients and the other for dry. This small adjustment makes the process much smoother.

    Maintaining a steady oil temperature is crucial. Always fry in small batches and use a thermometer if not using a deep fryer. A semi-dried batter like this also makes these mushrooms ideal for air frying if you prefer a lighter version.

    How to Store and Reheat Your Crispy Fried Mushrooms

    To keep leftover crispy fried mushrooms tasty, cool them completely before storing them in an airtight container in the refrigerator for up to three days. Reheat them in an air fryer or a hot oven at 375°F for 5–7 minutes to restore their crispy texture.

    Freezing is not recommended, as the mushrooms can become soggy once thawed, losing their signature crunch.

    Would you also like me to suggest a few dipping sauce ideas for them?

    Crispy Fried Mushrooms

    Golden, crunchy, and full of savory flavor, these crispy fried mushrooms feature white button mushrooms coated with a seasoned panko crust and fried to irresistible perfection.
    Prep Time 15 minutes
    Cook Time 20 minutes
    Total Time 35 minutes

    Ingredients
      

    • ½ teaspoon kosher salt
    • 1 cup buttermilk
    • 1 ¼ cups panko breadcrumbs
    • ½ teaspoon garlic powder
    • 1 ½ teaspoons Old Bay Seasoning
    • 1 ½ lbs white button mushrooms stems trimmed
    • vegetable oil for frying
    • 1/4 teaspoon fresh ground black pepper
    • 1/2 cup all-purpose flour
    • 1 teaspoon marjoram

    Instructions
     

    • In a small mixing bowl, thoroughly combine the panko breadcrumbs, Old Bay seasoning, marjoram, garlic powder, and kosher salt. Pour the buttermilk into a separate shallow bowl.
    • Carefully rinse the mushrooms under cold water, ensuring they are dried completely using a paper towel. Transfer the dried mushrooms into a large zipper-style plastic bag, add the flour, and shake well until evenly coated.
    • Dip each floured mushroom into the buttermilk, ensuring full coverage, then roll them through the seasoned breadcrumb mixture until fully coated.
    • In a Dutch oven, heavy-bottomed pot, or deep fryer, heat approximately 1¼ inches of vegetable oil to a steady 375°F.
    • Gently lower several breaded mushrooms into the hot oil, frying them in small batches for 2–3 minutes until they achieve a deep golden brown color.
    • Using a slotted spoon, remove the fried mushrooms and drain on a plate lined with paper towels.

    Notes

    While convention suggests wiping mushrooms with a damp paper towel, rinsing them under cold water and drying them thoroughly ensures a cleaner result.
    To prevent messy hands during breading, designate one hand for dipping in buttermilk and the other for rolling in breadcrumbs.
    This simple semi-dry coating method is equally effective for air frying.
    When frying without a deep fryer, utilize a candy thermometer to maintain an accurate oil temperature of 375°F.
    Always fry in small batches to help sustain a consistent oil temperature for optimum crispness.
  • Amish Onion Fritters

    Amish Onion Fritters

    Amish Onion Fritters are a nostalgic comfort food, featuring tender onions enveloped in a light, crispy batter that’s simply irresistible. Perfect for snacking or as a savory side, they come together quickly and satisfy every time.

    Golden brown and perfectly seasoned, Amish Onion Fritters deliver everything you love about classic onion rings without the fuss. Enjoy them alone or with your favorite dipping sauces for a true crowd-pleaser.

    Key Ingredients for the Best Amish Onion Fritters

    • All-Purpose Flour – Forms the essential base, giving structure and a delicate crispness to every fritter.
    • Granulated Sugar – Adds a subtle hint of sweetness that balances the savory flavors beautifully.
    • Cornmeal – Introduces a slight grainy texture and deeper flavor that sets these fritters apart.
    • Baking Powder – Lends the fritters their airy, fluffy lift, creating a light and tender bite.
    • Salt – Enhances all the flavors, ensuring every mouthful is perfectly seasoned.
    • Milk – Brings moisture to the batter, making it thick enough to coat the onions without being heavy.
    • Onions – The heart of the recipe, chopped onions become sweet and tender when fried, offering bursts of flavor with every bite.

    How to Make Amish Onion Fritters: Quick and Easy Steps

    Start by mixing all the dry ingredients together until well combined. Pour in the milk, stirring to create a thick, cohesive batter. Gently fold in the chopped onions until fully incorporated.

    Heat about half an inch of oil in a skillet to a steady 350°F–375°F. Drop heaping tablespoons of batter into the hot oil, slightly flattening each one. Fry until both sides are golden and crispy, then drain on paper towels.

    Tips and Variations for Perfect Amish Onion Fritters

    For even crispier fritters, let the batter rest for 10 minutes before frying. This small step allows the baking powder to activate fully, enhancing the fritters’ lightness. Try adding a pinch of cayenne pepper or smoked paprika to the batter if you enjoy a little heat. You can also swap the milk with buttermilk for an extra tangy flavor boost that complements the sweetness of the onions beautifully.

    If you want to create a more substantial side dish, stir in a handful of shredded cheddar cheese or finely chopped chives before frying. They add a rich, savory dimension that’s hard to resist.

    How to Store and Reheat Your Amish Onion Fritters

    To keep Amish Onion Fritters fresh, allow them to cool completely before storing them in an airtight container lined with paper towels. They’ll stay good in the refrigerator for up to three days.

    For reheating, avoid the microwave to preserve their crispiness. Instead, warm them in a preheated oven at 375°F for about 8–10 minutes until they regain their crunch. You can also freeze them after cooling, separating layers with parchment paper, and reheat directly from frozen for a quick, satisfying treat.

    Would you like me to also suggest a few dipping sauce ideas to pair with these fritters? 🍽️

    Amish Onion Fritters

    These delectable Amish onion fritters feature tender, savory onions enveloped in a light, airy batter. Ideal as a snack or side dish, they deliver a satisfying crispness and flavor that pairs wonderfully with your favorite dipping sauce.
    Prep Time 10 minutes
    Cook Time 30 minutes
    Total Time 40 minutes

    Ingredients
      

    • 2 tsp baking powder
    • 3/4 cup all-purpose flour
    • 1 –2 tsp salt to taste
    • 1 Tbsp cornmeal
    • 3/4 cup milk
    • 1 Tbsp granulated sugar
    • 1 1/2 medium onions chopped (approximately 2 1/2 cups)

    Instructions
     

    • Combine the all-purpose flour, cornmeal, granulated sugar, baking powder, and salt in a mixing bowl, ensuring the ingredients are well blended.
    • Gradually pour the milk into the dry mixture and stir until a thick batter forms.
    • Incorporate the chopped onions thoroughly into the batter, ensuring even distribution.
    • In a heavy skillet, heat about 1/2 inch of oil over medium-high heat until it reaches a temperature between 350°F and 375°F.
    • Using a tablespoon, carefully drop portions of the batter into the hot oil, gently flattening each mound slightly with the back of the spoon.
    • Fry each fritter until golden brown and crisp on both sides, turning once as needed.
    • Remove the fritters from the oil and allow them to drain on paper towels. Serve promptly while warm.

    Notes

    These fritters are delightful when served with ranch dressing or your favorite dipping sauce. Adjust the salt to taste based on preference.
  • Mississippi Sin Quiche

    Mississippi Sin Quiche

    Mississippi Sin Quiche captures all the rich, savory flavors of the beloved dip in a tender, flaky pie crust. Perfect for brunch, breakfast, or a hearty snack, this dish never disappoints.

    Packed with ham, melty cheese, and a hint of spice, Mississippi Sin Quiche is an irresistible crowd-pleaser. It’s a freezer-friendly recipe that guarantees satisfaction bite after bite.

    Ingredients that Make Mississippi Sin Quiche Unforgettable

    • Diced ham – Provides a hearty, smoky bite that forms the flavorful foundation of the quiche.
    • Cream cheese – Melts into the filling for a lusciously creamy texture and subtle tang.
    • Shredded cheddar cheese – Adds rich, sharp flavor and an irresistible cheesy pull.
    • Green onion – Brings a mild, fresh pop of flavor that balances the richness.
    • Hot sauce – Delivers just a whisper of heat to elevate the savory notes.
    • Worcestershire sauce – Deepens the umami flavor profile with a hint of complexity.
    • Sour cream – Introduces extra creaminess and a slight tang for a silky custard base.
    • Heavy cream – Enriches the filling for a smooth, decadent texture.
    • Eggs – Bind all the ingredients together into a beautifully set quiche.
    • Deep-dish pie crust – A buttery, flaky vessel that holds all the deliciousness in place.

    How to Bring Your Mississippi Sin Quiche to Life

    Start by preheating your oven to 350ºF. Warm the diced ham in a skillet for a few minutes to eliminate excess moisture, then mix it with cream cheese, hot sauce, and Worcestershire sauce.

    Spoon the ham mixture into the bottom of the pie crust, then sprinkle over the cheddar cheese and green onion. Whisk together the eggs, sour cream, and heavy cream, and pour this creamy mixture over the ham.

    Bake for 60 minutes until the center is set and the top is lightly golden. Let it cool slightly before slicing into generous wedges of savory perfection.

    Savvy Tips & Tasty Twists for Mississippi Sin Quiche

    For the ultimate Mississippi Sin Quiche, make sure your ham is well-drained before mixing to avoid a soggy crust. Don’t hesitate to experiment with spicy pepper jack cheese instead of cheddar for a little extra heat.

    If you love texture, try adding a handful of sautéed mushrooms or roasted red peppers into the mix. You can even swap the traditional pie crust for a hash brown crust for a fun breakfast twist!

    Keeping the Sin Alive: Storing Your Mississippi Sin Quiche

    To store leftover Mississippi Sin Quiche, allow it to cool completely, then cover and refrigerate for up to four days. For longer storage, wrap slices tightly and freeze for up to three months.

    When ready to enjoy, thaw overnight in the fridge. Reheat covered with foil at 350ºF for about 20 minutes, or until warmed through, keeping the quiche perfectly tender and flavorful.

    Mississippi Sin Quiche

    A luscious quiche brimming with all the beloved flavors of the classic Mississippi Sin dip. Perfect for breakfast, brunch, or anytime indulgence. This recipe can be conveniently prepared ahead of time and stored in the freezer for future use.
    Prep Time 10 minutes
    Cook Time 1 hour
    Total Time 1 hour 10 minutes

    Ingredients
      

    • 1 9-inch deep dish pie crust
    • ¼ teaspoon hot sauce
    • 1 cup diced ham
    • 3 tablespoons sour cream
    • 2 ounces cream cheese
    • ½ cup shredded cheddar cheese
    • 1 cup heavy cream
    • ½ teaspoon Worcestershire sauce
    • 1 green onion chopped
    • 3 eggs

    Instructions
     

    • Preheat the oven to 350ºF. Warm the diced ham in a skillet over medium heat for approximately 3 to 5 minutes to eliminate excess moisture, then remove from heat. In a large bowl, blend the ham, cream cheese, hot sauce, and Worcestershire sauce until well combined. Evenly spread the ham mixture across the bottom of the pie crust, then sprinkle the shredded cheddar cheese and chopped green onion over the top. In a separate bowl, vigorously whisk together the eggs, sour cream, and heavy cream until smooth, then pour the egg mixture over the ham filling. Bake the quiche for 60 minutes, or until fully set and golden on top.

    Notes

    This quiche can be assembled in advance and frozen prior to baking. When ready to bake, thaw completely and follow the standard baking instructions. If freezing after baking, thaw the quiche and cover with aluminum foil before reheating in a 350ºF oven for 30 to 40 minutes.
  • Crack Sticks

    Crack Sticks

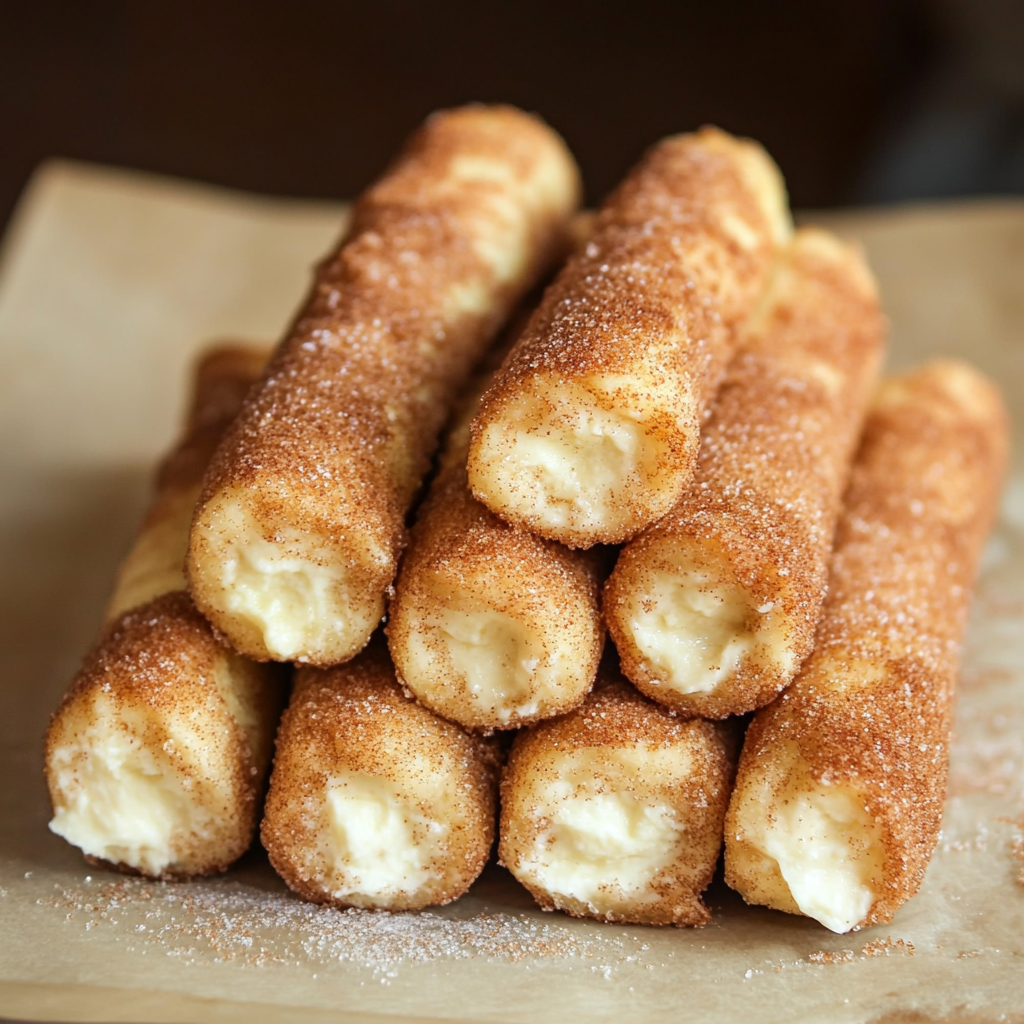
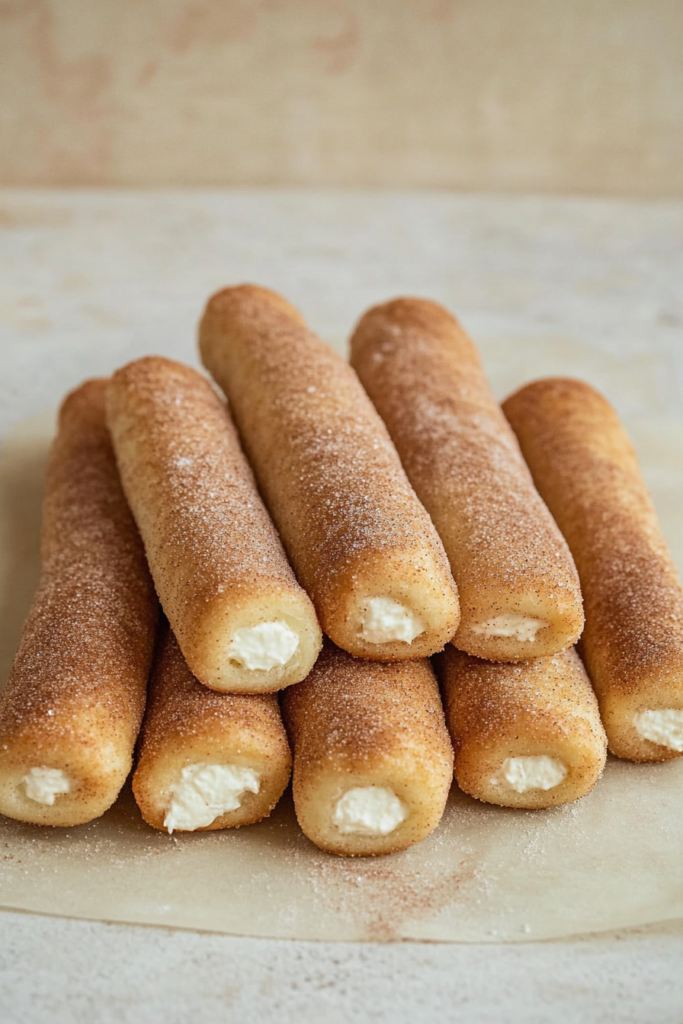
    Crack Sticks are the perfect sweet treat when you need something delicious, fast, fun, and very crispy. These bite-sized delights combine creaminess, cinnamon warmth, and irresistible crunch all in one.

    Every bite of Crack Sticks melts in your mouth with buttery cinnamon sugar goodness wrapped around rich, creamy centers. Whether for a party, snack, or a cozy night in, these are dangerously addictive.

    The Key Ingredients for Crack Sticks

    • White bread – Soft and easy to roll, it crisps beautifully in the oven for the perfect bite.
    • Cream cheese – Provides a rich, tangy filling that contrasts perfectly with the sweet coating.
    • Powdered sugar – Lightly sweetens the cream cheese for a luscious, creamy center.
    • Granulated sugar – Caramelizes slightly in the oven, creating that signature crackly crust.
    • Cinnamon – Adds warmth and spice, enhancing the cozy, comforting flavor.
    • Butter – Helps the cinnamon sugar stick and gives the rolls their golden, crispy finish.

    How to Make Crack Sticks – A Quick Overview

    Start by beating the cream cheese with powdered sugar until velvety smooth. In separate bowls, set up the cinnamon-sugar mixture and melted butter.

    Trim the crusts from your bread slices, roll each one flat, and spread with the cream cheese mixture. Roll up tightly, dip each roll in butter, then generously coat in cinnamon sugar.

    Place the coated rolls onto a parchment-lined baking sheet and bake at 350°F for about 20 minutes, until crisp, golden, and incredibly tempting.

    Tips and Fun Twists for Crack Sticks

    For an extra twist, try adding a hint of vanilla extract to the cream cheese mixture or sprinkling a pinch of nutmeg into the cinnamon sugar. Want even more crunch? After baking, give the rolls a final dusting of cinnamon sugar while they’re still warm.

    These Crack Sticks can easily be customized with other fillings too—think Nutella, peanut butter, or even a fruity jam for a different flavor profile. Just keep the filling light so the sticks hold their shape and crisp up nicely.

    Best Ways to Store Your Crack Sticks

    If you happen to have leftovers, store Crack Sticks in an airtight container at room temperature for up to two days. To maintain their signature crunch, avoid refrigeration as it can make them soggy.

    For longer storage, freeze the baked sticks in a single layer on a tray before transferring them to a freezer bag. Reheat in a 300°F oven for about 10 minutes to restore their crispy magic.

    Crack Sticks

    These delectable treats are delightfully quick to prepare, offering a crisp exterior with a luscious, creamy center. Perfect for entertaining or a fun snack, they deliver irresistible flavor with every bite.
    Prep Time 10 minutes
    Cook Time 20 minutes
    Total Time 30 minutes

    Ingredients
      

    • 2 teaspoons cinnamon
    • 16 slices white bread crusts removed
    • 3/4 cup butter melted
    • 1 cup sugar
    • 8 ounces cream cheese softened
    • 3/4 cup powdered sugar

    Instructions
     

    • Using a hand mixer, whip together the softened cream cheese and powdered sugar in a mixing bowl until smooth and creamy. In a separate shallow bowl, stir the sugar and cinnamon together until well combined. Place the melted butter into another bowl for dipping. Lay out the slices of bread and, using a rolling pin, flatten each piece evenly. Spread a generous layer of the cream cheese mixture over each slice, roll tightly, then immerse each roll first in the melted butter followed by a thorough coating in the cinnamon sugar blend. Arrange the prepared rolls on a baking sheet lined with parchment paper. Transfer the sheet to an oven preheated to 350°F and bake for 20 minutes, or until golden and crisp.

    Notes

    For best results, serve warm, and consider doubling the recipe for larger gatherings.
  • Christmas Oreo Balls

    Christmas Oreo Balls

    Celebrate the festive season with these delightful Christmas Oreo Balls, a no-bake treat that’s sweet, chewy, and decadently dipped in white chocolate. They’re easy, adorable, and completely irresistible.

    With just a few ingredients like Oreos, cream cheese, and white chocolate, Christmas Oreo Balls come together in under an hour and are perfect for gifting, party trays, or simply indulging at home.

    Essential Ingredients for Christmas Oreo Balls

    • OREO cookies – The heart of this recipe, these cookies provide a rich, chocolatey base with a creamy touch from the filling.
    • Cream cheese – Softened and blended into the crumbs, it creates that luscious, melt-in-your-mouth texture.
    • White chocolate melting wafers – Perfectly smooth and sweet, they coat each ball with a festive, snowy finish.
    • Seasonal sprinkles – The magic touch that makes each ball sparkle with holiday spirit.

    How to Make Christmas Oreo Balls

    Start by crushing your Oreos into fine crumbs, either with a food processor or the old-fashioned zip-top bag and rolling pin method.

    Blend the Oreo crumbs with softened cream cheese until fully combined, then scoop and roll into bite-sized balls. Freeze briefly until slightly firm.

    Melt the white chocolate wafers, dip each ball carefully using a fork, and tap off the excess chocolate for a smooth finish. Quickly decorate with seasonal sprinkles before the coating sets.

    Chill until completely hardened and enjoy every dreamy, chocolatey bite!

    Tips and Fun Variations for Perfect Christmas Oreo Balls

    For a smoother dip, ensure your Oreo balls aren’t too cold when dipping into the melted chocolate, as extreme cold can cause cracking. If the mixture feels too soft while rolling, freeze briefly before dipping.

    Get creative by turning these into mini snowmen: use mini Oreos for hats, a dab of chocolate for eyes and mouths, and a tiny orange sprinkle for the nose. Decorate while the chocolate coating is still wet so everything sticks beautifully.

    Switch up the chocolate too—try milk or dark chocolate for a richer twist, or add a peppermint extract to the dough for a holiday flavor explosion.

    Storing Your Christmas Oreo Balls Like a Pro

    To keep your Christmas Oreo Balls fresh and delicious, store them in an airtight container in the refrigerator for up to one week. If making ahead or saving leftovers, they freeze beautifully for up to two months. Thaw in the fridge overnight before serving to maintain their perfect texture and flavor.

    Christmas Oreo Balls

    Indulge in these delightful Christmas Oreo Balls crafted from crushed Oreos and softened cream cheese, all cloaked in a luscious coat of white chocolate and adorned with festive sprinkles. These treats are irresistibly chewy, decadently rich, and perfect for any holiday celebration.
    Prep Time 20 minutes
    Chill time 15 minutes
    Total Time 35 minutes

    Ingredients
      

    • 8 ounces white chocolate melting wafers
    • 36 OREO cookies with filling
    • 1 8-ounce package cream cheese, softened
    • Seasonal sprinkles

    Instructions
     

    • Line a baking sheet with parchment paper to begin. Crush the Oreos into fine crumbs using a food processor or by placing them in a zip-top bag and rolling over them with a rolling pin. In a large bowl, blend the Oreo crumbs and softened cream cheese with an electric mixer until fully combined; if the mixture remains crumbly, knead by hand until smooth. Scoop the dough using a small cookie scoop and arrange portions onto the prepared baking sheet, then roll each into a smooth ball with your hands. Freeze the Oreo balls for 10 to 15 minutes until slightly firm but not hard. In the meantime, melt the white chocolate in a microwave-safe bowl by heating it in 30-second intervals, stirring thoroughly after each, until completely smooth. Using a fork, dip each chilled Oreo ball into the melted chocolate, tapping the fork gently against the bowl’s edge to allow excess chocolate to drip off for a clean finish. Employ a toothpick to assist in sliding the coated ball back onto the baking sheet. Immediately sprinkle with seasonal decorations before the chocolate sets. Allow the balls to harden completely at room temperature or in the refrigerator. Store the finished Oreo balls in an airtight container in the refrigerator until ready to serve.

    Notes

    Oreos: Approximately one package of Oreos is needed. For a less rich result, consider removing the filling from about half of the cookies.
    Variations: Customize these treats by turning them into snowmen with a mini Oreo for a hat, tiny dots of melted chocolate for the eyes and mouth, and a single orange sprinkle for the nose. Apply decorations before the chocolate sets.
    Storage: Keep the Oreo balls refrigerated in an airtight container for up to 1 week or freeze for up to 2 months.